Archives 2025

Expert Tips for Fixing a Clogged Drain

A clogged drain is one of the most common—and annoying—plumbing problems homeowners face. Whether it’s a slow-draining sink, a backed-up shower, or a toilet that refuses to flush properly, a blockage in your plumbing system can disrupt your day and lead to bigger problems if left unaddressed. Fortunately, with a few expert tips, you can tackle most clogs yourself and know when to call in a professional plumber.

Understanding the Basics of Drain Clogs

Before diving into solutions, it helps to understand what typically causes clogs. Most blockages in household plumbing are due to the gradual accumulation of debris:

In the kitchen: Grease, food particles, and soap scum are the usual suspects.

In the bathroom: Hair, soap residue, and toothpaste can create a nasty mix.

In the toilet: Too much toilet paper or non-flushable items can create stubborn blockages.

The good news? Many of these issues can be fixed without expensive tools or major repairs.

Tip 1: Start with Boiling Water

It might sound too simple to work, but boiling water can be surprisingly effective—especially for minor clogs caused by grease or soap. Slowly pour a kettle of boiling water directly into the drain in two to three stages, allowing it to work for several seconds between pours.

Avoid this method if your plumbing includes PVC pipes, as the high heat can loosen joints or cause damage.

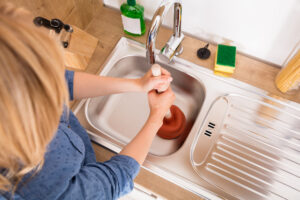
Tip 2: Use a Plunger Properly

Every homeowner should own a good plunger. The key is choosing the right one: a cup plunger works best for sinks and tubs, while a flange plunger is ideal for toilets.

To use a plunger:

Create a tight seal over the drain.

Push and pull with a steady, forceful motion.

Repeat several times, then check if the water drains away.

Make sure there’s enough water to cover the rubber cup—it helps increase suction power.

Tip 3: Try a DIY Drain Cleaner

Commercial drain cleaners can be harsh on your pipes and the environment. A safer, more natural alternative uses common household items:

Pour 1/2 cup of baking soda into the clogged drain.

Follow it with 1/2 cup of vinegar.

Cover the drain to contain the fizzing reaction.

Wait 15–30 minutes, then flush with hot water.

This method works best on organic buildup and minor clogs.

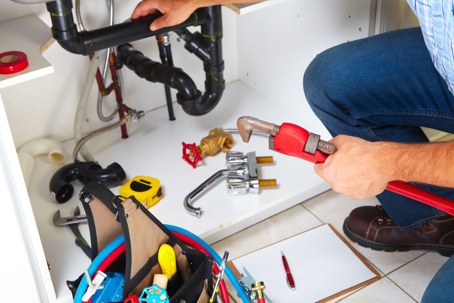
Tip 4: Use a Drain Snake or Auger

When boiling water and plunging don’t work, a drain snake (also called a plumbing auger) might do the trick. These flexible tools are designed to navigate your pipes and break up or retrieve clogs.

To use one:

Insert the snake into the drain.

Crank the handle to extend the coil.

When you feel resistance, twist and push gently to dislodge the clog.

Pull out the debris or flush it through with water.

For deeper or more stubborn blockages, a motorized auger may be more effective, though that’s typically best left to professionals.

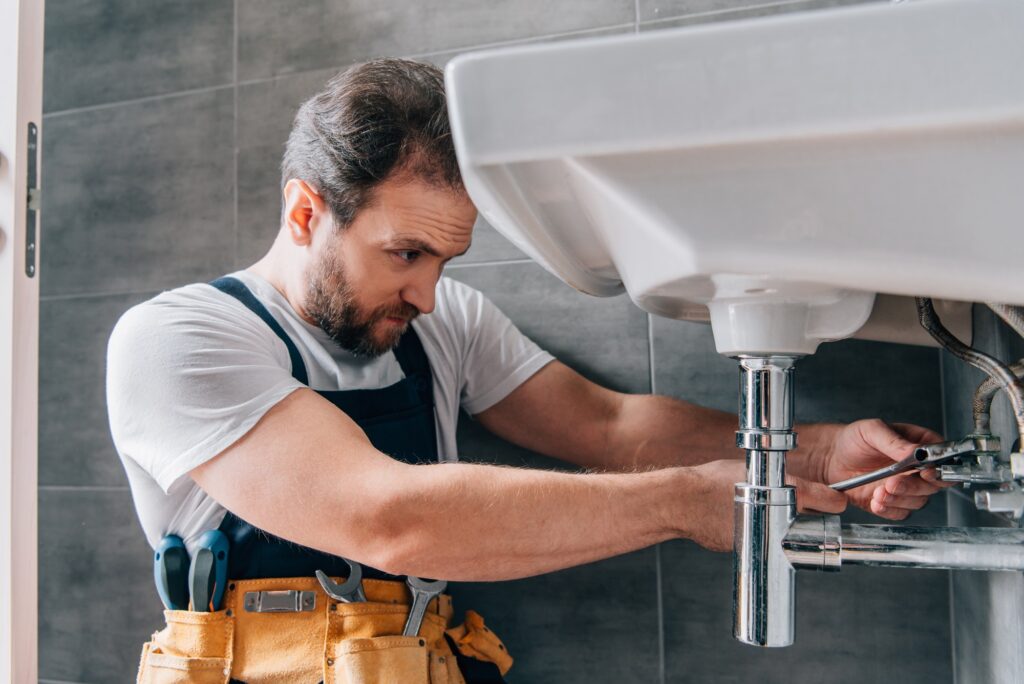
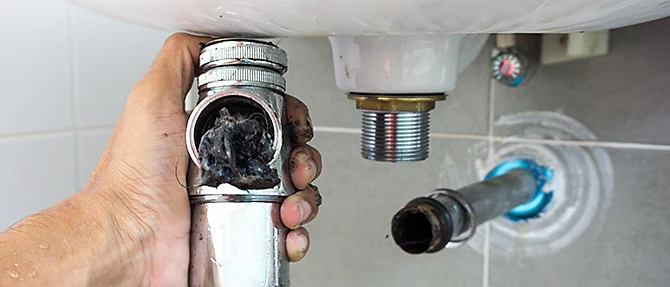
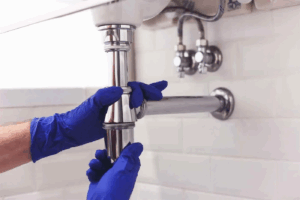
Tip 5: Clean the P-Trap

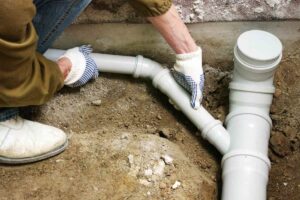
For sink clogs, especially in the kitchen, the problem is often in the P-trap—the U-shaped pipe beneath the sink. To clean it:

Place a bucket underneath to catch any water or debris.

Unscrew the slip nuts using pliers or your hands.

Remove the P-trap and clear out any buildup.

Reassemble and run water to check for leaks.

This is a simple plumbing fix that often solves slow drainage issues immediately.

Tip 6: Prevent Future Clogs

Once your drain is clear, it’s time to prevent it from happening again. Here are some preventative plumbing tips:

Use drain strainers in sinks and showers to catch hair, food, and debris.

Avoid pouring grease or oil down the kitchen sink.

Run hot water after each use to help clear buildup.

Clean your drains monthly using the baking soda and vinegar method.

Educate your household on what should (and shouldn’t) be flushed or washed down.

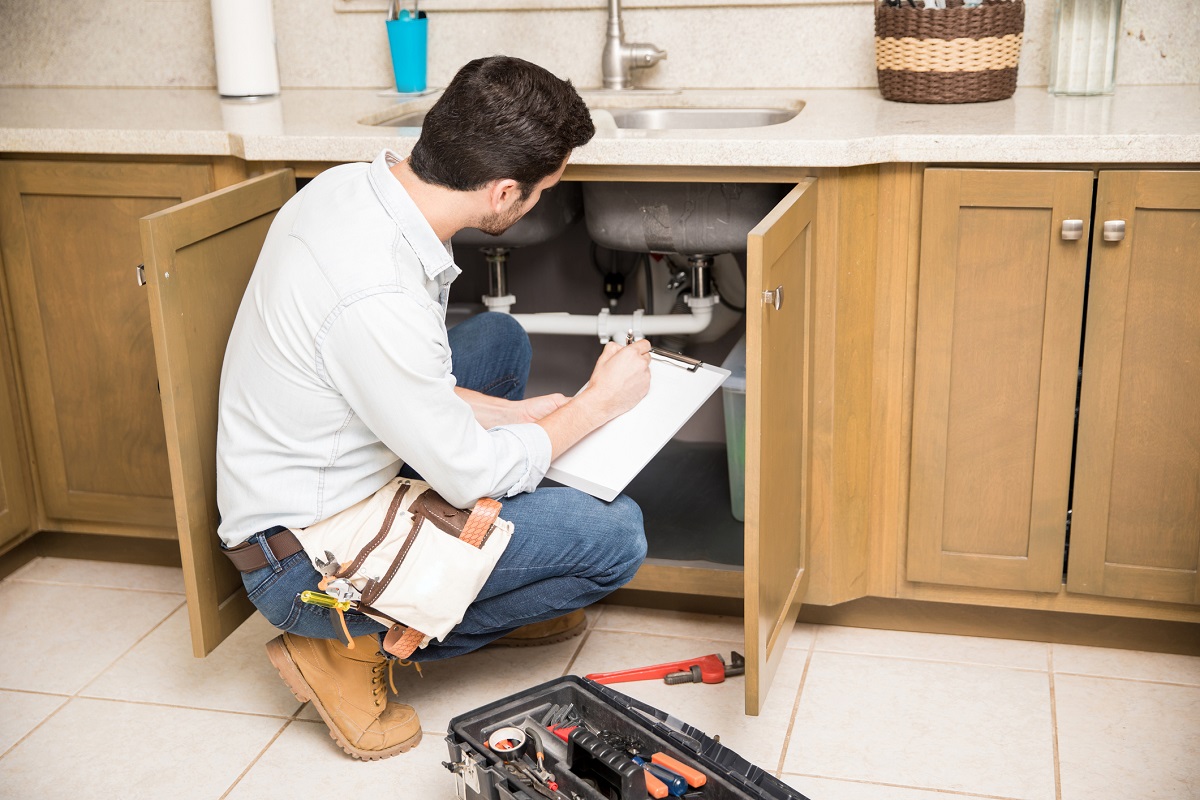
When to Call a Professional Plumber

While many clogs can be handled with DIY methods, some situations call for expert help. Call a licensed plumber if:

You’ve tried multiple methods and the clog remains.

You notice recurring blockages in multiple drains.

There’s a foul odor coming from your drains that won’t go away.

You hear gurgling sounds or see water backing up into other fixtures.

These can be signs of more serious issues like tree roots in the main sewer line or collapsed pipes—problems that require professional plumbing inspection and repair.

Fixing a clogged drain doesn’t always require a plumber’s visit, but knowing your limits is just as important as knowing the tools. With a bit of knowledge and the right techniques, you can maintain healthy plumbing and avoid costly repairs. So next time your sink slows to a crawl or your tub starts to fill, you’ll be ready with expert-approved solutions.

How Often Should You Inspect Your Home Plumbing?

As a homeowner, maintaining a safe and functional living environment is crucial. Plumbing systems are an essential part of your home’s infrastructure, and regular maintenance is key to preventing costly repairs and avoiding potential disasters. But how often should you inspect your home plumbing? Let’s explore why plumbing inspections are vital, what to look for during inspections, and how often you should conduct these checks.

The Importance of Plumbing Inspections

Plumbing issues can sometimes go unnoticed until it’s too late. From hidden leaks that waste water to clogged pipes that cause significant water damage, plumbing problems can escalate quickly. Regular plumbing inspections help you catch these problems early, which can save you a lot of money and stress in the long run. Additionally, regular inspections can prolong the lifespan of your plumbing system, keeping your home comfortable and safe.

Here are some of the main reasons why you should conduct routine plumbing inspections:

Early Detection of Leaks: Leaky pipes and fixtures can cause significant water damage, not only to the plumbing system itself but to the structure of your home. A small, unnoticed leak can lead to mold growth and costly repairs.

Prevention of Clogs: Over time, pipes can become clogged with grease, hair, soap scum, and debris. Regular inspections allow you to identify these problems before they cause blockages that could disrupt your daily life.

Save on Water Bills: Plumbing leaks, even small ones, can lead to high water bills. Detecting and fixing leaks promptly can help you save on water costs.

Improve System Efficiency: An efficient plumbing system ensures that water flows smoothly through your home. Regular inspections ensure that your pipes, water heater, and other plumbing components are functioning properly.

Avoid Major Disasters: A burst pipe or significant plumbing failure can cause massive damage to your home. Regular inspections reduce the risk of such catastrophic events by addressing issues before they escalate.

How Often Should You Inspect Your Plumbing?

The frequency of plumbing inspections depends on various factors, such as the age of your home, the condition of your plumbing system, and whether you’ve experienced issues in the past. However, there are general guidelines that can help determine how often to inspect your plumbing system.

Annual Inspections: For most homeowners, an annual plumbing inspection is a good rule of thumb. This annual check-up should include a thorough review of your entire plumbing system. A licensed plumber can inspect all visible pipes, faucets, and fixtures, checking for leaks, signs of wear, and other potential problems.

Older Homes: If you live in an older home, you should schedule plumbing inspections more frequently—at least once every 6 to 12 months. Older plumbing systems, especially those with galvanized pipes or other outdated materials, are more prone to corrosion, leaks, and blockages.

After Major Weather Events: After heavy rains, floods, or extreme temperatures, you should inspect your plumbing system. These events can put additional stress on your pipes, and it’s important to check for any visible damage or blockages.

If You Experience Plumbing Issues: If you notice unusual sounds from your pipes, low water pressure, slow drains, or any other plumbing problems, don’t wait for your next scheduled inspection. Call a professional plumber to inspect your system and address the issue.

What to Look for During a Plumbing Inspection

Whether you’re doing the inspection yourself or hiring a professional plumber, there are several things to look for when inspecting your plumbing system. Here are some key things to check:

Leaky Pipes: Check for signs of water stains or mold on walls, ceilings, or floors, as these can indicate a leaky pipe. Even small leaks can waste a lot of water, so they should be addressed immediately.

Water Pressure: Test the water pressure in various areas of your home. Low water pressure could indicate clogged pipes or a malfunctioning water valve.

Clogs and Slow Drains: Check your sinks, showers, and tubs for signs of slow drainage. Standing water can be a sign of a clog or blockage deep within your plumbing system.

Pipe Corrosion: If your pipes are made of metal, check for signs of rust or corrosion. Corroded pipes can leak or burst if not repaired or replaced.

Water Heater Condition: Inspect your water heater for any signs of leaks or rust. Make sure the temperature is set at a safe level (around 120°F) to avoid scalding and energy waste.

Toilet Functionality: Ensure your toilet is flushing properly and check for any leaks around the base. A constantly running toilet can waste a significant amount of water.

Sewer System: If you have access to a cleanout valve, check it for any signs of blockage or backflow. If you notice foul odors or slow drains, this could be a sign of a sewer line issue.

Fixture Condition: Inspect all faucets, showerheads, and other fixtures for leaks or mineral buildup. Cleaning them can improve water flow and efficiency.

How to Maintain Your Plumbing System

Regular inspections are just one part of maintaining your plumbing system. Here are some additional tips to keep your plumbing in top shape:

Avoid Pouring Grease Down the Drain: Grease and oil can harden in your pipes, leading to clogs. Instead, dispose of grease in a separate container.

Use Drain Screens: Install screens in your sinks and showers to catch hair and debris before they go down the drain.

Flush Your Water Heater Regularly: Sediment buildup can reduce the efficiency of your water heater. Flushing it once a year can help it run more efficiently.

Fix Small Problems Immediately: If you notice minor plumbing issues, such as a small drip or slow drain, address them right away to prevent bigger problems from developing.

Regular plumbing inspections are a vital part of home maintenance. While the frequency of inspections depends on your home’s age and condition, aiming for an annual inspection is a great starting point. Whether you do it yourself or hire a professional plumber, keeping an eye on your plumbing system can help you avoid costly repairs and ensure that your home remains safe and comfortable. So, don’t wait for a plumbing emergency—take action today to protect your home and your wallet!

Emergency Plumbing Costs Explained

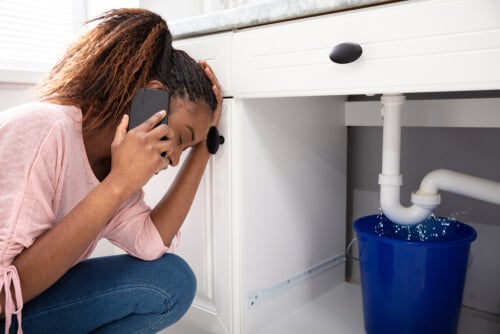
lumbing problems have an uncanny knack for occurring at the worst possible times. Picture this: it’s a cold winter night, and suddenly, a pipe bursts. Or it’s Thanksgiving Day, and your kitchen sink clogs just as you’re preparing a meal for a house full of guests. These situations are not only inconvenient—they can be costly. Understanding emergency plumbing costs is essential for every homeowner who wants to be prepared for the unexpected.

In this article, we’ll dive deep into what makes emergency plumbing so expensive, typical price ranges for common services, and proactive steps you can take to avoid financial surprises when plumbing problems strike.

What Constitutes a Plumbing Emergency?

Before we discuss costs, it’s important to define what qualifies as a plumbing emergency. Not all plumbing issues require immediate attention—some can wait until regular business hours, saving you a bundle in after-hours fees.

Here are examples of true plumbing emergencies:

A burst pipe or major leak causing active flooding

A sewer backup or clogged main drain line

A water heater failure in cold weather

Frozen pipes that may burst

No access to running water in the home

Overflowing toilets or clogged fixtures in a single-bathroom home

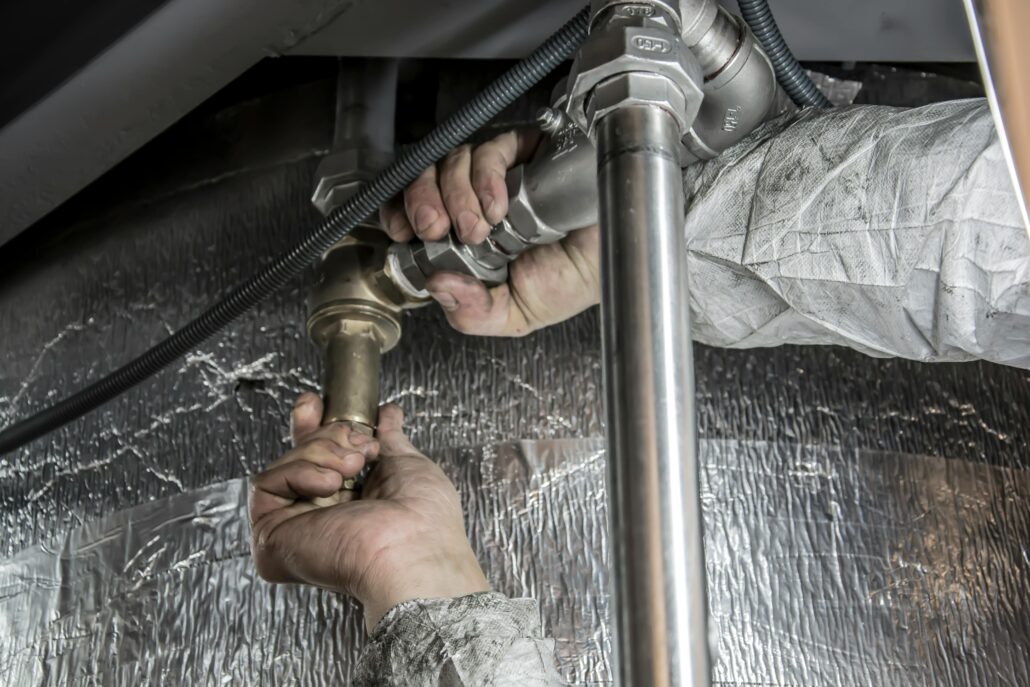
Issues like a slow-draining sink, a leaky faucet, or low water pressure are usually not considered emergencies unless they worsen suddenly. When in doubt, contact a local plumbing company to evaluate the urgency of your situation.

Why Emergency Plumbing Costs More

Emergency plumbing costs more than regular plumbing services for several reasons. It’s not just about fixing the problem—it’s about the time, availability, and effort it takes to deliver fast and effective solutions.

  1. After-Hours and Holiday Premiums

Plumbers typically work standard hours—usually 8 a.m. to 5 p.m., Monday through Friday. When a homeowner calls for service on a weekend, holiday, or during the night, the plumber must leave their off-hours schedule behind. That often involves overtime pay and higher service fees.

Emergency response rates can be 1.5 to 3 times the regular hourly rate, depending on the plumbing company and the time of day.

  1. Immediate Response and Travel Costs

Time is critical during a plumbing emergency. You’re paying for a technician to travel quickly to your location—often bumping you ahead of scheduled appointments. Some plumbers may also charge additional fees if they need to travel long distances or if traffic and access are an issue.

  1. Complex Repairs Under Pressure

Emergency plumbing issues are typically more complex than routine fixes. Whether it’s locating a hidden leak behind a wall, thawing and repairing frozen pipes, or replacing a broken water heater, these jobs may require specialized tools and fast decision-making. That added complexity contributes to higher labor and equipment costs.

  1. Potential Damage Control

In many cases, the plumber must mitigate or prevent water damage while addressing the root problem. This could mean working quickly to shut off water valves, pump out water, or secure exposed pipes. The additional time and resources used for damage control can drive up the overall cost.

Factors That Influence Emergency Plumbing Costs

Beyond the nature and timing of the issue, several additional factors play a role in determining the total bill:

- Location: Urban areas often have higher rates due to greater demand and overhead costs.

- Severity of the problem: A minor leak may take an hour to fix, while a full pipe replacement could take a full day or more.

- Accessibility: If your pipes are behind walls or under concrete, additional demolition and restoration work may be required.

- Materials and parts: Emergency replacements, especially of high-end components, can increase the cost.

- Time and labor: Long repair jobs billed hourly will be significantly more expensive during emergencies.

How to Avoid Emergency Plumbing Expenses

While not all emergencies are preventable, homeowners can take proactive steps to reduce the likelihood—and cost—of a crisis.

  1. Perform Regular Plumbing Maintenance

Schedule annual inspections with a licensed plumber to identify worn-out fixtures, corrosion, or signs of leaks. Cleaning out your drains, checking your water pressure, and flushing your water heater are all preventive measures that help avoid future issues.

  1. Winterize Your Plumbing

In colder climates, frozen pipes are a leading cause of emergency plumbing calls. Insulating pipes, keeping cabinets open, and letting faucets drip during freezing weather can prevent serious damage.

  1. Learn How to Shut Off the Water Supply

In the event of a leak, turning off your home’s main water valve can stop flooding and save thousands in water damage and repair costs. Make sure every adult in the household knows where the valve is and how to use it.

  1. Keep Emergency Contacts Handy

Don’t wait for a plumbing disaster to search online for a local plumber. Research trusted professionals in your area and keep their contact information accessible. Look for those with 24/7 emergency services and good reviews.

  1. Get Multiple Estimates (When Possible)

If your emergency isn’t immediate—for example, a slow water heater failure—consider calling more than one plumber for an estimate. Even during emergencies, a few minutes of research can result in significant savings.

Should You Buy a Plumbing Service Plan?

Some plumbing companies offer service or maintenance plans for an annual fee. These plans typically include:

Scheduled maintenance visits

Priority service during emergencies

Discounted labor and parts

Waived emergency call-out fees

If you live in an older home or have frequent plumbing issues, enrolling in a plan could pay for itself over time.

Be Prepared and Stay Informed

Emergency plumbing situations can be both stressful and expensive, but they don’t have to be financially devastating. By understanding why emergency plumbing costs are higher, what services typically cost, and how to minimize the risk of emergencies, you can protect both your home and your wallet.

Plumbing issues are an unavoidable part of homeownership. But with preparation, a basic knowledge of your plumbing system, and a trusted plumber on call, you can handle emergencies with confidence and clarity.

How to Fix a Leaky Faucet: A Step-by-Step Guide

A leaky faucet is one of the most common household plumbing problems. Not only is the constant dripping sound annoying, but it can also waste gallons of water over time—leading to higher utility bills and potential water damage. The good news? You don’t need to be a plumbing expert to fix a leaky faucet. With a few basic tools and a little patience, you can tackle this DIY project in under an hour.

In this guide, we’ll walk you through how to fix a leaky faucet, whether you have a compression, cartridge, ceramic disk, or ball-type faucet. Let’s roll up our sleeves and get started!

Step 1: Identify the Type of Faucet

Before you can repair your faucet, it’s important to know what type you’re working with. Faucets generally fall into four categories:

Compression Faucet: Uses rubber washers that wear out over time. Often found in older homes.

Cartridge Faucet: Has a cartridge that controls water flow; easy to repair.

Ceramic Disk Faucet: Uses a cylinder with holes; highly durable but more expensive to fix.

Ball Faucet: Common in kitchens, with a ball bearing mechanism.

Knowing your faucet type helps you buy the right replacement parts and follow the correct steps.

Step 2: Gather Your Tools

You don’t need a full plumbing toolkit, but here are the essentials:

Adjustable wrench

Flathead and Phillips screwdrivers

Replacement parts (washers, O-rings, or cartridges depending on faucet type)

Penetrating oil (like WD-40)

Plumber’s grease or silicone-based grease

Rag or towel

Bowl or container (to catch small parts)

Step 3: Turn Off the Water Supply

Locate the water shutoff valves under the sink and turn them clockwise to stop the water flow. Open the faucet to release any remaining water and pressure from the lines. It’s also a good idea to plug the drain with a sink stopper or cloth to avoid losing small parts.

Step 4: Disassemble the Faucet

Carefully remove the faucet handle using a screwdriver. You might need to pry off a decorative cap first. Once the handle is off, use your wrench to remove the packing nut, then pull out the stem or cartridge.

For ball-type or ceramic disk faucets, follow the manufacturer’s instructions. Be sure to take note of how everything fits together or take a picture for reference.

Step 5: Inspect the Parts

Now comes the detective work. Look closely at the rubber washers, O-rings, or cartridge:

Worn Washer: If the washer looks cracked, hardened, or misshapen, it’s time to replace it.

Damaged O-ring: These create a seal and are common culprits for leaks around the handle.

Faulty Cartridge or Ball Assembly: If you notice mineral deposits or corrosion, a full replacement may be necessary.

Take the worn parts to a hardware store to find exact matches—faucet parts are not one-size-fits-all.

Step 6: Replace and Reassemble

Apply a small amount of plumber’s grease to the new parts to ensure smooth installation and prevent future wear. Replace the washers, O-rings, or cartridge as needed, making sure everything is seated properly.

Then, reassemble the faucet in the reverse order you took it apart. Tighten all components gently—don’t overtighten, as this can strip threads or crack the housing.

Step 7: Turn On the Water and Test

Slowly turn the shutoff valves back on and test your faucet. Check for drips or leaks. If water still leaks, you may need to disassemble and ensure parts are correctly seated or revisit the type of part you replaced.

Extra Tips for Successful Plumbing Repairs

Know When to Call a Plumber: If your faucet is still leaking after replacement or if you notice water pooling under the sink, the issue might be deeper in your plumbing system.

Use Quality Parts: Cheap replacements can wear out quickly. Always choose high-quality washers, cartridges, or seals.

Stay Organized: Lay parts out in the order you removed them to avoid confusion during reassembly.

Be Patient: Plumbing repairs take some finesse. Rushing can lead to overtightening or incorrect installation.

Why It Matters

Fixing a leaky faucet isn’t just about saving money—it’s about conserving resources and protecting your home. According to the EPA, household leaks waste nearly 1 trillion gallons of water annually in the U.S. alone. Taking care of minor plumbing issues promptly is a small act with a big impact.

Learning how to fix a leaky faucet is an empowering skill that saves time, money, and water. With a little knowledge and the right tools, you can handle this common plumbing issue on your own. The next time you hear that steady drip, you’ll know exactly what to do.

How to Detect and Fix a Running Toilet

A running toilet might not seem like a big issue at first, but it can quietly waste hundreds of gallons of water every day—draining both your wallet and our planet’s resources. Fortunately, identifying and fixing a running toilet is often a straightforward DIY task that doesn’t require advanced plumbing skills. With just a bit of knowledge and a few simple tools, you can solve the problem quickly and efficiently.

Signs Your Toilet Is Running

The most obvious sign is sound. If you hear a hissing or trickling sound long after flushing, water is likely flowing into the bowl or tank unnecessarily. You might also notice your water bill creeping higher without a clear cause. Another easy test is to put a few drops of food coloring in the tank and wait about 30 minutes without flushing. If the color seeps into the bowl, your toilet is leaking internally.

Common Causes of a Running Toilet

A running toilet typically stems from issues with three main components inside the tank:

Flapper – This rubber piece lifts to allow water from the tank into the bowl during a flush. If it’s warped or not sealing properly, water will continuously leak into the bowl.

Fill Valve (or Ballcock) – This component refills the tank after a flush. If it’s malfunctioning or misadjusted, it might overfill the tank or fail to shut off completely.

Float – This part tells the fill valve when to stop adding water. If the float is set too high, the tank will overfill, causing water to flow into the overflow tube.

Step-by-Step Guide to Fixing a Running Toilet

Before you begin, turn off the water supply to the toilet. You’ll usually find a valve on the wall behind it. Turn it clockwise until it stops. Then, flush the toilet to empty the tank.

  1. Inspect the Flapper

Lift the lid off the tank and examine the flapper. Is it closing all the way? Is it cracked or degraded? If yes, it needs to be replaced.

To replace the flapper, unhook the chain and detach the flapper from the mounting pegs.

Take the old flapper to the hardware store to ensure you buy the correct size and style.

Install the new flapper by snapping it into place and reconnecting the chain to the flush lever.

Test the toilet by turning the water back on and flushing. If the problem persists, move to the next step.

  1. Adjust the Float

If the flapper is working, the issue may be with the water level. Check the float’s position:

If you have a ball float (attached to a long arm), gently bend the arm downward so the float sits lower in the tank.

If you have a cylindrical float that moves up and down the fill valve shaft, use the adjustment clip or screw to lower its position.

The water should stop about 1 inch below the top of the overflow tube.

  1. Check the Fill Valve

If adjusting the float doesn’t help, your fill valve may be faulty. Replacing it is a simple task:

Disconnect the water supply hose from the bottom of the tank.

Unscrew the plastic nut that holds the fill valve in place.

Remove the old valve and insert the new one, adjusting the height according to the manufacturer’s instructions.

Tighten the nut, reconnect the water line, and turn the water back on.

Watch to see if the tank refills properly and stops at the correct level.

When to Call a Plumbing Professional

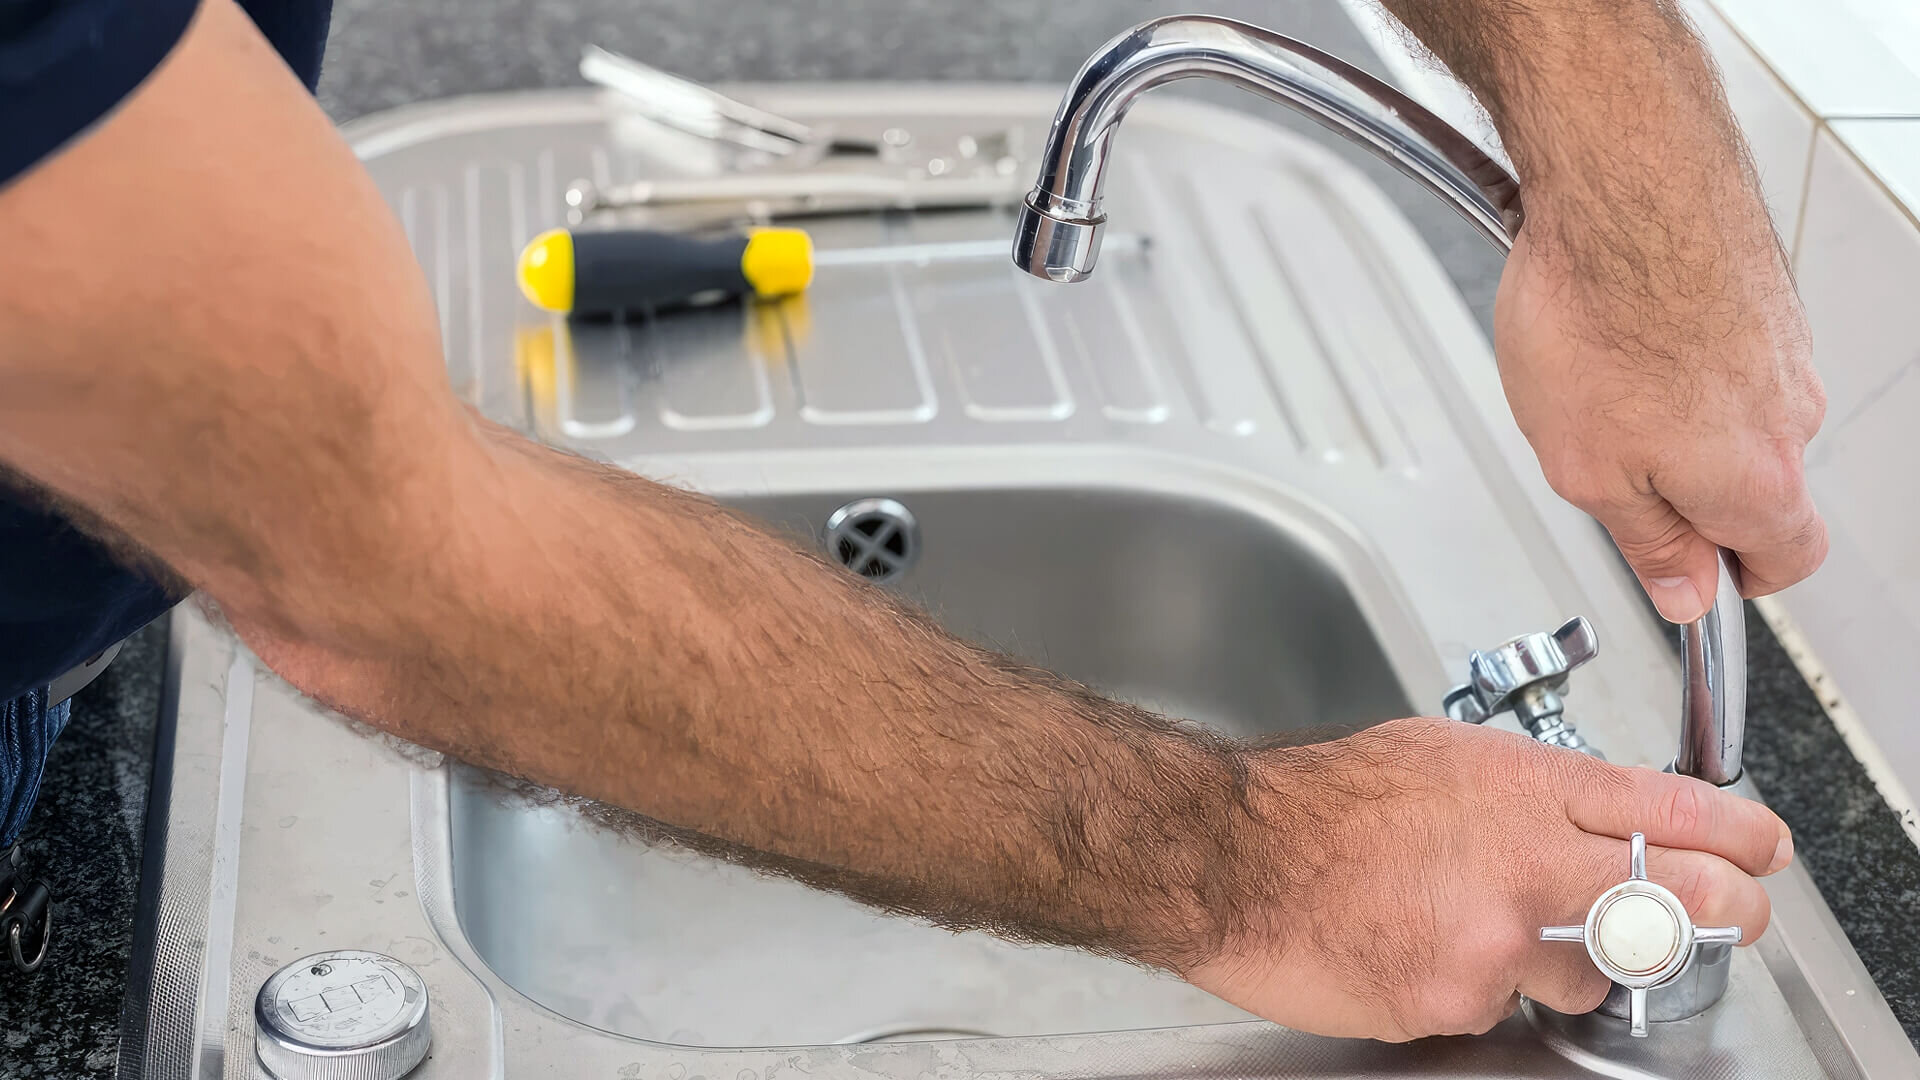
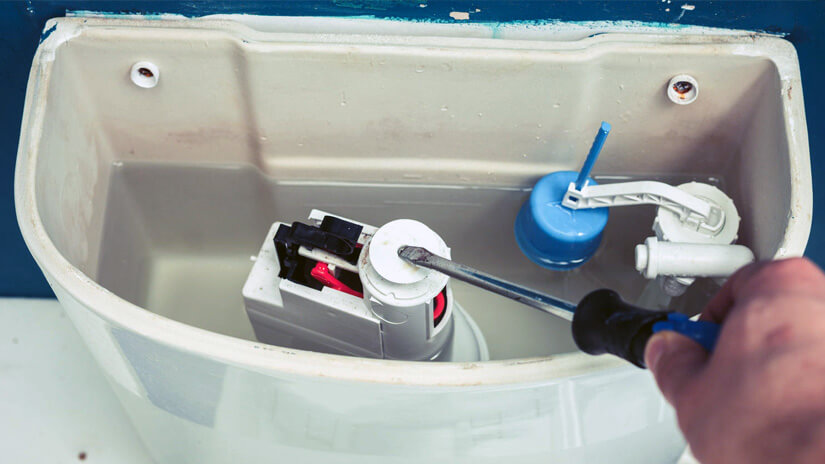
If you’ve tried the above steps and your toilet is still running, it might be time to call a plumbing expert. In rare cases, the problem could stem from mineral buildup, damaged internal seals, or a cracked overflow tube—issues that may require specialized tools and experience to resolve.

Even though a running toilet may seem like a small annoyance, fixing it promptly can prevent water damage and help you avoid unnecessary expenses. Professional plumbing services are especially helpful if your home has older or complex toilet systems that are difficult to repair.

Preventing Future Toilet Issues

To keep your toilet running smoothly:

Check the flapper and fill valve every six months.

Avoid using bleach tablets in the tank; they can deteriorate rubber components over time.

Be gentle with the flush lever to prevent wear on the chain and flapper.

Keep an eye on your water bill—unexpected spikes often signal hidden leaks.

Fixing a running toilet doesn’t have to be intimidating. With a little time and the right approach, you can solve the problem without calling a professional. That said, never hesitate to reach out to a trusted plumbing service if the issue seems out of reach. Your toilet works hard every day—keeping it in top shape is a small investment with big returns in savings and sustainability.

Top 5 Plumbing Repairs Every Homeowner Should Know


Every homeowner eventually faces issues that require plumbing repairs. From dripping faucets to clogged drains, knowing how to handle some basic fixes yourself can save you both time and money. While not every plumbing problem is a DIY job, understanding the most common ones empowers you to decide when to take action and when to call in a pro. Let’s explore the top five plumbing repairs that every homeowner should be familiar with.

  1. Fixing a Leaky Faucet

A dripping faucet isn’t just annoying—it can waste hundreds of gallons of water per year. The culprit is usually a worn-out washer or O-ring inside the faucet mechanism. In most cases, you can disassemble the faucet using a wrench, identify the faulty component, and replace it with a matching part from your local hardware store.

For this repair:

Turn off the water supply under the sink.

Plug the drain to avoid losing small parts.

Use the proper tools to avoid damaging the fixture.

This type of plumbing repair is among the easiest, and doing it yourself often costs under $10.

  1. Unclogging Drains

Whether it’s the kitchen sink, bathroom basin, or shower, clogged drains are a common nuisance. Grease, hair, and soap residue tend to accumulate over time, restricting water flow. While chemical drain cleaners are widely available, they can damage pipes if used repeatedly. A better option is to use a plunger or a drain snake.

For minor clogs:

Try pouring boiling water down the drain.

Use a mixture of baking soda and vinegar to dissolve buildup.

If that fails, use a hand auger (drain snake) to remove deeper blockages.

Keeping your drains clean through regular maintenance can prevent major plumbing issues later on.

  1. Replacing a Toilet Flapper

If your toilet keeps running after you flush, it could be a faulty flapper in the tank. The flapper is a rubber valve that controls water flow from the tank to the bowl. When it doesn’t seal properly, water continuously leaks, causing your toilet to run and your water bill to rise.

To fix this:

Turn off the toilet’s water supply.

Drain the tank by flushing.

Remove the old flapper and install a new one, making sure it fits snugly over the valve seat.

This simple plumbing repair usually takes less than 15 minutes and requires no special tools.

  1. Fixing Low Water Pressure

Low water pressure can make everyday tasks like showering or washing dishes frustrating. It may be due to mineral buildup in faucet aerators or showerheads. In some cases, it could be a sign of a bigger problem, like a pipe leak or an issue with your main water line.

Start with the easy fixes:

Unscrew the aerator or showerhead and soak it in vinegar to dissolve mineral deposits.

Rinse thoroughly and reinstall.

If pressure is still low throughout the house, it’s wise to contact a licensed plumbing professional to inspect for more serious issues.

  1. Repairing a Running Toilet Fill Valve

If your toilet won’t fill correctly or makes a hissing sound, the fill valve may be at fault. This component regulates the tank’s water level after flushing. Over time, it can wear out or become misaligned, leading to inefficient flushing or constant refilling.

To replace a faulty fill valve:

Shut off the water and empty the tank.

Disconnect the water supply line and remove the old valve.

Install a new one, adjusting the float to set the correct water level.

Most fill valve kits come with instructions and are designed for easy installation, even for beginners.

Why Basic Plumbing Skills Matter

Being familiar with these fundamental plumbing repairs can help you respond quickly during emergencies and reduce reliance on professionals for minor issues. That said, some situations—like burst pipes, sewage backups, or problems inside walls—require professional expertise and specialized equipment.

Taking preventive steps, such as insulating exposed pipes and regularly inspecting visible plumbing, can also extend the life of your system and reduce the frequency of repairs.

When to Call a Professional

While many homeowners are capable of handling small repairs, knowing your limits is just as important. If you’re unsure about the scope of a problem, it’s better to consult a licensed plumber. Incorrect repairs can lead to water damage, mold growth, and expensive remediation costs.

Every homeowner should feel empowered to take on basic plumbing repairs, from fixing a leaky faucet to replacing a toilet flapper. These small tasks, when done right, can maintain your home’s comfort and reduce your utility bills. A little knowledge, the right tools, and some confidence can go a long way in keeping your plumbing in great shape.

Remember, plumbing doesn’t have to be intimidating. With practice and precaution, you can handle many common issues yourself—and for everything else, a trusted plumber is just a call away.

How to Choose the Right Plumbing Service Provider

Whether it’s a leaking faucet, a clogged drain, or a burst pipe, plumbing issues can cause serious stress for homeowners and business operators alike. Finding a reliable plumbing service provider can make the difference between a quick, efficient fix and a costly, frustrating ordeal. With so many options available, how do you ensure you’re making the right choice? Here’s a detailed guide to help you choose the right plumbing professional for your needs.

  1. Check for Proper Licensing and Insurance

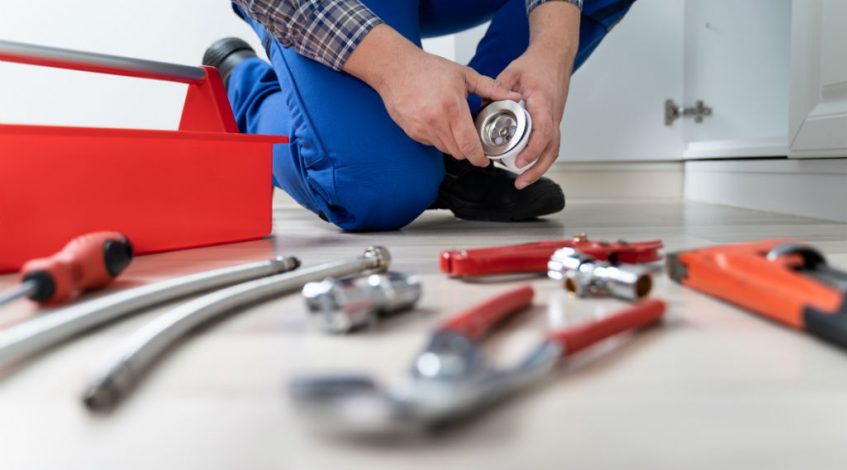
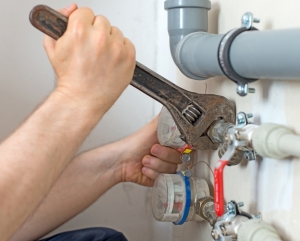
One of the first things to look for in a plumbing service provider is proper licensing. A licensed plumber has gone through the necessary training and testing to perform plumbing tasks safely and effectively. Licensing requirements vary by state or region, so be sure to verify what’s required in your area and ensure the plumber meets those standards.

Additionally, ensure that the plumber is insured. Insurance protects both you and the service provider in case of accidents or damage during the job. General liability insurance and worker’s compensation are key indicators of a professional operation.

  1. Evaluate Experience and Specialization

While every plumber starts somewhere, experience matters—especially for complex jobs. A plumbing company with several years in business is likely to have seen a wide range of problems and knows how to handle them efficiently.

Also, consider specialization. Some plumbers focus on residential systems, while others may be experts in commercial plumbing or new construction. Make sure the provider has experience relevant to your particular issue.

  1. Read Reviews and Ask for References

Online reviews can offer valuable insight into the quality of service provided. Platforms like Google, Yelp, and Better Business Bureau (BBB) allow customers to share their experiences. Look for consistent themes in reviews, such as punctuality, communication, professionalism, and cleanliness.

It’s also wise to ask the plumbing company for references. Speaking directly with previous clients can give you a more personal perspective on what to expect.

  1. Understand Pricing and Estimates

Transparent pricing is essential. A trustworthy plumber will provide a detailed written estimate before starting any work. This should include the cost of parts, labor, and any other potential fees. Avoid companies that give vague or verbal quotes and pressure you into decisions.

Compare estimates from multiple providers, but remember—cheapest isn’t always best. Low prices can sometimes indicate poor quality work or the use of substandard materials.

  1. Assess Availability and Response Time

Plumbing emergencies don’t wait for business hours. Whether it’s a midnight pipe burst or a Sunday sewage backup, quick response time can prevent thousands of dollars in damage. Choose a plumbing service that offers emergency services and has a reputation for quick, reliable responses.

Ask how the company handles urgent calls and what kind of support is available after hours. A service with 24/7 availability and a dedicated hotline is a good sign of reliability.

  1. Verify Warranty and Work Guarantees

Reputable plumbing service providers stand behind their work. They should offer warranties on both parts and labor. This gives you peace of mind that if something goes wrong shortly after the repair, you’re covered.

Before hiring, ask about their warranty policy and get it in writing. Make sure you understand what is covered, for how long, and what conditions may void the warranty.

  1. Evaluate Professionalism and Communication

Professionalism goes beyond showing up on time and doing the job—it includes how a company communicates with you, handles your concerns, and treats your home. From the first call or email, take note of their demeanor. Are they courteous and informative? Do they answer your questions clearly?

Good communication ensures fewer misunderstandings and better results. A professional plumbing provider should be willing to walk you through the issue, explain possible solutions, and keep you informed throughout the job.

  1. Look for Local and Established Businesses

Local plumbing companies often have a stronger incentive to provide good service—they rely on community reputation and repeat customers. They’re also more likely to be familiar with local codes, regulations, and common plumbing issues specific to the area.

An established business with a physical location adds to their credibility. It’s a sign that they’re invested in the community and not just chasing short-term profits.

Choosing the right plumbing service provider doesn’t have to be overwhelming. By focusing on factors like licensing, experience, communication, and transparency, you can find a professional who gets the job done right the first time.

Remember, plumbing isn’t just about fixing leaks or clearing drains—it’s about protecting one of your most valuable investments: your home. Take the time to do your research, ask the right questions, and trust your instincts. A little effort up front can save you time, money, and frustration down the line.

Whether you’re dealing with a plumbing emergency or planning routine maintenance, making an informed choice will ensure your plumbing needs are met with efficiency and professionalism.

Why Plumbing Inspections Are Worth the Investment

When it comes to maintaining a home, some problems are obvious—cracked windows, leaky roofs, or flickering lights. Others, like issues lurking in your plumbing system, often go unnoticed until they become expensive emergencies. This is why plumbing inspections are not just a smart idea; they are a valuable investment in the long-term health of your home and wallet.

What Is a Plumbing Inspection?

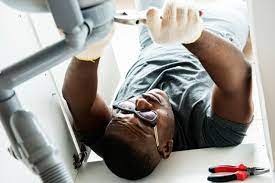
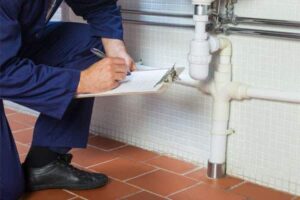
A plumbing inspection is a thorough assessment of your entire plumbing system, usually conducted by a licensed professional. This includes checking pipes, drains, water heaters, faucets, toilets, and more. Modern inspections may also involve the use of video cameras to look inside sewer lines or detect hidden leaks behind walls.

These inspections help identify both existing issues and potential problems before they escalate. While some homeowners only call in a plumber when something goes wrong, a proactive approach through regular inspections can save thousands in repair costs and water damage remediation.

Prevent Expensive Emergencies

One of the most compelling reasons to invest in plumbing inspections is to avoid surprise emergencies. A tiny leak under the sink or in a basement pipe might not seem serious today, but given enough time, it can lead to mold growth, structural damage, or skyrocketing water bills. Worst-case scenarios include burst pipes or sewage backups, which are both unpleasant and incredibly costly to fix.

By scheduling regular inspections, you can catch these issues early. Prevention is not only more affordable—it also saves you the stress and inconvenience of dealing with a plumbing disaster at the worst possible time.

Extend the Life of Your Plumbing System

Just like a car, your home’s plumbing system benefits from routine maintenance. Over time, pipes corrode, fixtures wear out, and sediment builds up in water heaters. A thorough inspection can identify components that are nearing the end of their lifespan and help you plan for replacements on your terms, rather than under emergency conditions.

By investing in routine inspections, you extend the life of your plumbing system and avoid the need for premature upgrades or replacements. This approach ensures that your system functions efficiently for years to come.

Save Money on Utility Bills

Leaky pipes and inefficient water heaters contribute to increased water and energy bills. A dripping faucet alone can waste over 3,000 gallons of water a year. Through regular plumbing inspections, inefficiencies can be detected and addressed immediately.

Many inspections also include checking for water pressure irregularities and identifying old fixtures that could be replaced with more energy-efficient models. Small improvements can lead to significant savings over time, making your home more environmentally friendly and reducing your monthly expenses.

Safeguard Your Home’s Value

If you’re considering selling your home in the future, a well-maintained plumbing system adds value. Potential buyers are more likely to make offers on homes with clean inspection reports. Conversely, if a buyer’s inspector uncovers hidden plumbing issues, it could lead to renegotiation, delayed closing, or even a lost sale.

A recent inspection report showing a clean bill of health can provide peace of mind to both the seller and the buyer. It’s a simple step that adds transparency and confidence during real estate transactions.

Meet Local Code Requirements

In many areas, plumbing must meet local building codes and regulations. If you plan to remodel your kitchen or bathroom, you may be required to pass inspections as part of the permitting process. Proactive plumbing inspections ensure your system is up to code, helping you avoid fines or delays in your renovation timeline.

In older homes, especially, plumbing systems may have outdated materials or configurations that no longer comply with today’s standards. An inspection can pinpoint areas that need upgrading to meet legal and safety requirements.

Peace of Mind for Homeowners

Owning a home can be stressful, especially when you’re worried about what might be going wrong behind the walls. Plumbing inspections offer peace of mind by providing a clear picture of your system’s current condition. Knowing that your pipes, drains, and fixtures are in good shape means one less thing to worry about.

Additionally, when inspections are done routinely—every one to two years—they create a history of system performance and upkeep. This record can be helpful when filing insurance claims or working with contractors.

What to Expect During an Inspection

During a standard plumbing inspection, the plumber will:

Examine visible piping for corrosion, leaks, and blockages

Test water pressure and flow in various fixtures

Inspect toilets for leaks and proper flushing

Check the water heater for efficiency and safety

Evaluate drainage speed in sinks, tubs, and showers

Use camera inspection for sewer lines if needed

The plumber will provide a detailed report, often with recommendations for repairs, upgrades, or further testing.

A Smart Investment in Your Home

In the grand scheme of homeownership, the cost of a plumbing inspection is a small price to pay compared to the financial, emotional, and logistical toll of a major plumbing failure. Whether you’re a first-time homeowner or someone looking to protect a long-term investment, scheduling regular inspections is a simple, proactive step that pays off in numerous ways.

So, the next time you think about home maintenance, don’t forget about your plumbing. An inspection today could save you thousands tomorrow—and give you priceless peace of mind in the meantime.

How Often Should You Have Your Plumbing Checked?

When was the last time you had your plumbing checked? If you can’t remember, you’re not alone. For many homeowners, plumbing inspections aren’t top-of-mind until something goes wrong—like a burst pipe, a clogged drain, or an unexpected leak. However, much like getting an oil change for your car or scheduling a yearly physical, regular plumbing maintenance is essential for keeping your home running smoothly and avoiding costly repairs.

So how often should you actually have your plumbing inspected? The answer depends on several factors, including the age of your home, the materials used in your plumbing system, and any past issues you’ve encountered. Let’s dive into why plumbing inspections are important, what they involve, and how often you should schedule them.

Why Plumbing Inspections Matter

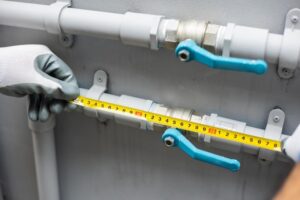
Your plumbing system works hard every day, quietly delivering clean water and removing waste from your home. Over time, wear and tear, mineral build-up, tree root intrusion, and simple aging can cause components to fail. A professional plumbing inspection helps identify small problems before they escalate into major, expensive disasters.

Here are a few key benefits of regular plumbing checks:

Early detection of leaks – Even a tiny leak can waste gallons of water and cause mold or structural damage.

Improved water pressure – Issues like sediment buildup can reduce water flow, which an inspection can uncover.

Longer lifespan of appliances – Water heaters, dishwashers, and washing machines last longer when supplied with clean, properly flowing water.

Peace of mind – Knowing your plumbing is in good condition reduces the likelihood of sudden emergencies.

How Often Should You Get a Plumbing Inspection?

For most homeowners, a full plumbing inspection every two years is a good rule of thumb. However, some situations call for more frequent checks:

Older Homes (50+ years): If your home has older pipes, such as galvanized steel or cast iron, you should have your plumbing inspected annually. These materials are prone to corrosion and deterioration over time.

Well Water Systems: If you rely on a private well, you’ll need to monitor both your water quality and your plumbing system more closely. An annual inspection can help ensure everything is functioning safely and efficiently.

High Tree Density Areas: Tree roots can invade underground sewer lines, leading to backups and expensive repairs. If your property has many trees, consider scheduling annual plumbing inspections.

Frequent Plumbing Issues: If you’ve had multiple leaks, clogs, or water pressure problems in the past, it’s wise to increase the frequency of your plumbing checks to once a year.

Before Buying or Selling a Home: A thorough plumbing inspection is critical during a real estate transaction. Buyers want to ensure they’re not inheriting expensive plumbing issues, and sellers can use a clean bill of health to increase buyer confidence.

What Does a Plumbing Inspection Include?

A comprehensive plumbing inspection goes beyond a quick glance under the sink. A licensed plumber will assess your entire plumbing system, including:

Pipes and fittings – Checking for corrosion, leaks, and weak points.

Water heater – Examining temperature, pressure relief valve, and sediment buildup.

Drains and toilets – Testing for blockages, slow draining, and flushing performance.

Faucets and showerheads – Looking for leaks, poor water pressure, and faulty components.

Sump pump and sewer lines – Ensuring everything is operating correctly, especially in flood-prone areas.

Some inspections may also use video camera technology to look inside pipes and detect hidden issues without digging.

Signs You Need an Immediate Plumbing Check

While regular inspections are important, certain warning signs indicate you should call a plumber right away:

Unexpected spikes in your water bill

Discolored or rusty water

Slow drains throughout the house

Persistent foul odors from drains

Gurgling sounds in pipes or toilets

Visible mold or water stains on walls and ceilings

These symptoms often signal a deeper issue that needs professional attention before it worsens.

Simple Maintenance Between Inspections

While you should leave detailed plumbing assessments to the professionals, there are simple steps you can take to keep your system in good shape between inspections:

Don’t pour grease or oil down the drain.

Use drain strainers to catch hair and debris.

Avoid flushing anything other than toilet paper.

Check exposed pipes for signs of condensation or leaks.

Know where your main shut-off valve is located in case of emergencies.

By being proactive, you can reduce the strain on your plumbing and extend its lifespan.

Plumbing might be out of sight, but it shouldn’t be out of mind. Regular inspections—every two years for most homes, annually for older or problem-prone systems—can save you money, prevent water damage, and ensure everything works efficiently. Just like with any other critical system in your home, a little preventative care goes a long way.

What to Expect During a Plumbing Service Call

When something goes wrong with your pipes, drains, or water heater, calling a plumber is the first logical step. But if you’ve never scheduled a plumbing service call before, you might not know exactly what to expect. Understanding how the process works can help reduce stress and ensure that everything goes smoothly.

Whether you’re dealing with a leaky faucet, a clogged drain, or a major pipe burst, here’s a comprehensive look at what typically happens during a professional plumbing service visit.

  1. Scheduling the Appointment

It all starts with a phone call or online booking. When you contact a plumbing company, the representative will ask you a few basic questions:

What is the nature of the problem?

When did it start?

Is it an emergency?

Depending on your answers, they’ll schedule a convenient time for the plumber to visit. For urgent issues like flooding or sewage backup, many companies offer emergency plumbing services, often available 24/7.

Some plumbing businesses even provide same-day service for non-emergencies, especially if the issue could worsen quickly.

  1. Pre-Visit Confirmation

Most reputable plumbing services will confirm your appointment via text, phone, or email. Some companies even send a photo and name of the technician in advance for security and peace of mind. The confirmation often includes a time window for arrival, such as between 9 a.m. and 11 a.m.

  1. Arrival and Introduction

When the plumber arrives, they’ll typically introduce themselves, show proper identification, and explain what they’ll be doing. Don’t hesitate to ask questions—it’s part of their job to help you understand what’s going on.

Before beginning any work, many professionals will put on shoe covers or lay down protective mats to keep your home clean. This attention to detail is a good sign of professionalism.

  1. Initial Assessment and Diagnosis

The next step is a thorough assessment. The plumber will ask questions and visually inspect the problem area. For example, if you have low water pressure in your shower, they may check multiple fixtures to see if the problem is localized or systemic.

Using specialized tools such as moisture meters, cameras, or leak detectors, they can get a better understanding of what’s causing the issue. For clogged drains or sewer lines, they might use a video inspection tool to peer deep into your pipes.

Once the problem is identified, the plumber will explain their findings and offer solutions.

  1. Cost Estimate

Before any work begins, a professional plumber should provide you with a written or digital estimate. This estimate will include:

A description of the problem

Recommended solutions

Estimated time to complete the work

Cost of parts and labor

Reputable plumbing companies will be transparent about pricing. Some charge by the hour, while others offer flat-rate pricing for common jobs. Either way, nothing should start until you approve the estimate.

  1. Performing the Work

Once you give the green light, the plumber will get to work. Depending on the complexity of the job, this could take anywhere from 30 minutes to several hours.

For example:

Fixing a leaky faucet might take less than an hour.

Clearing a blocked drain might take a couple of hours.

Replacing a section of pipe or installing a new water heater could take most of the day.

Throughout the job, a good technician will keep you informed of their progress and let you know if anything unexpected comes up.

  1. Final Testing and Clean-Up

After the repair or installation is complete, the plumber will test the system to ensure everything is working as it should. This includes checking for leaks, verifying water flow, and making sure any appliances or fixtures are operating correctly.

Then comes the clean-up. Any professional worth their salt will leave the work area as clean—or cleaner—than they found it. That means removing debris, wiping down surfaces, and safely disposing of any old parts.

  1. Payment and Documentation

With the job done, it’s time to review the invoice. This should match the estimate unless additional issues were discovered and discussed during the visit.

Most plumbing companies accept various forms of payment—credit cards, checks, or digital payments—and some even offer financing for larger projects.

You should also receive documentation for your records, especially for larger jobs. This might include:

A detailed invoice

A warranty for parts or labor

Maintenance tips to help prevent future issues

  1. Follow-Up and Customer Service

The service doesn’t necessarily end when the plumber leaves. Many companies follow up via email or phone to make sure you’re satisfied. They may ask for feedback or offer tips on how to maintain your plumbing system.

If you’re happy with the work, this is a great time to leave a review or refer the company to friends and neighbors. Word-of-mouth remains one of the best ways to find quality plumbing professionals.

A plumbing service call doesn’t have to be stressful or mysterious. By knowing what to expect—from scheduling and diagnosis to repair and follow-up—you’ll be better prepared and more confident when issues arise.

Whether it’s a minor fix or a major repair, choosing a reputable and experienced plumbing provider can make all the difference.

Everything You Need to Know About Sewer Line Repair

A sewer line issue is one of the most dreaded problems a homeowner can face. It’s messy, disruptive, and often expensive. But understanding how sewer line repair works—and what options are available—can make the process much less daunting. Whether you’re noticing strange smells, slow drains, or soggy patches in your yard, these are all signs that you may have a sewer line issue that needs prompt attention.

What Is a Sewer Line and Why It Matters

Your home’s sewer line is the pipe that carries wastewater from your toilets, sinks, and appliances to the municipal sewer system or septic tank. It’s typically buried underground, which makes accessing it more challenging when problems arise. Sewer lines are essential for keeping your plumbing system functioning properly. When they break or become blocked, it can lead to serious issues like raw sewage backups and structural damage to your home.

Common Causes of Sewer Line Damage

There are several reasons a sewer line might need repair:

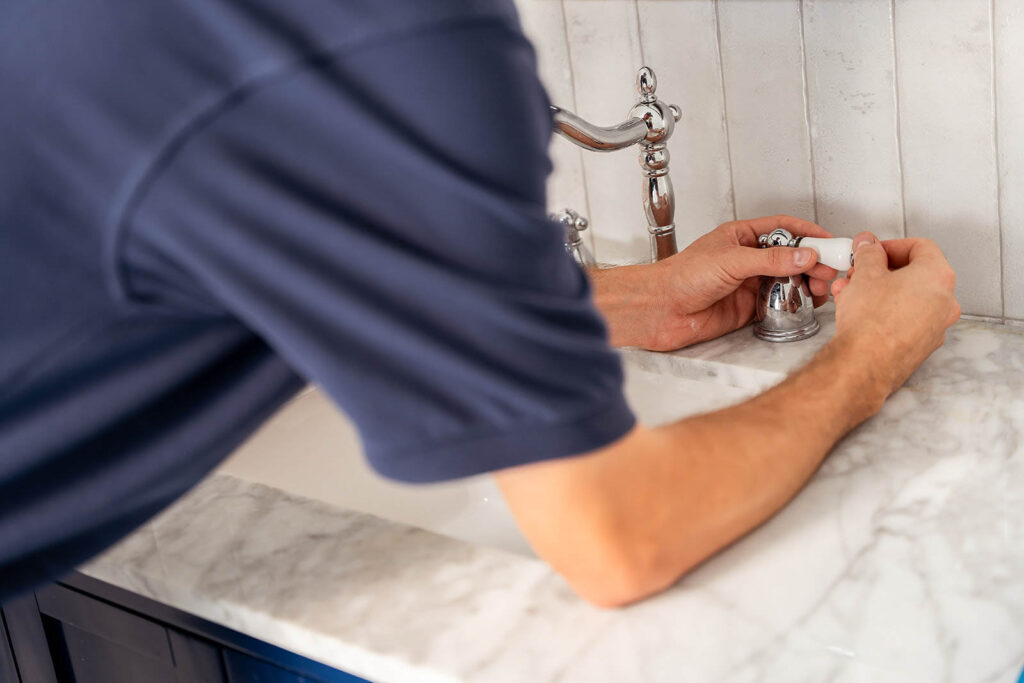
Tree Roots: One of the most common culprits, tree roots can infiltrate and damage pipes in search of moisture.

Aging Pipes: Over time, older pipes—especially those made from clay or cast iron—can corrode, collapse, or crack.

Clogs: Years of grease, hair, paper products, and foreign objects can create major blockages.

Shifting Soil: Earth movement due to heavy rains, nearby construction, or natural settling can cause pipes to shift or break.

Poor Installation: Faulty or outdated plumbing practices may lead to sewer line failures long before the pipe’s expected lifespan.

Warning Signs You Might Need Sewer Line Repair

Recognizing early signs of a problem can save you from a messy and expensive repair. Look out for:

Gurgling sounds from drains or toilets

Frequent clogs or multiple slow drains at once

Foul sewage odors in or around your home

Lush or soggy patches in the yard (indicating leakage)

Raw sewage backing up into tubs or basements

If you notice any of these, it’s time to call in a professional plumbing technician for an inspection.

Sewer Line Inspection and Diagnosis

Modern plumbing services often use video camera inspections to determine exactly what’s wrong with a sewer line. A small, waterproof camera is fed through the pipe, transmitting a real-time video feed. This helps identify the location and cause of the problem—be it roots, a collapsed section, or an obstruction.

This diagnostic step is crucial for recommending the most effective and least invasive repair option.

Sewer Line Repair Methods

There are two main types of sewer line repair: traditional (or open-trench) repair and trenchless repair.

Traditional (Open-Trench) Repair

This method involves digging up the damaged section of the sewer line and replacing it. While it’s often more labor-intensive and disruptive to your yard or driveway, it’s necessary in cases of severe pipe collapse or when the damaged area is easily accessible.

Trenchless Repair

As the name implies, trenchless repair is far less invasive. It involves minimal digging and is generally faster and more cost-effective in the long run. Common trenchless techniques include:

Pipe Lining (Cured-in-Place Pipe or CIPP): A resin-coated liner is inserted into the existing pipe and inflated until it hardens, essentially creating a new pipe within the old one.

Pipe Bursting: A new pipe is pulled through the old one while simultaneously fracturing the existing pipe outward.

These modern techniques often allow for repairs without tearing up landscaping, driveways, or sidewalks.

Cost Considerations

Sewer line repair costs can vary widely depending on the extent of damage, the repair method used, and local labor rates. On average, repairs may cost anywhere from $1,000 to $7,000, while a full replacement can exceed $10,000.

Getting a few quotes from licensed plumbing contractors can help ensure you get the best value and avoid unnecessary upsells.

Preventing Sewer Line Problems

While you can’t prevent all sewer line issues, you can reduce the risk with a few preventive steps:

Avoid planting trees near sewer lines

Don’t flush anything other than human waste and toilet paper

Schedule regular plumbing inspections if your home is older

Consider having a camera inspection done before buying a home

Routine maintenance and mindfulness can go a long way in protecting your plumbing infrastructure.

When to Call the Professionals

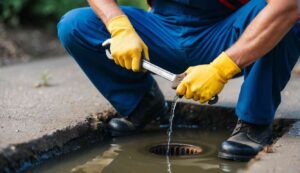
If you’re dealing with any warning signs or suspect a problem with your sewer line, don’t wait. Early intervention by a licensed plumbing expert can prevent more serious issues down the line. Attempting DIY fixes on something as critical and complex as a sewer system can lead to costly mistakes and even code violations.

A good plumbing contractor will not only diagnose the problem accurately but also explain your options clearly and provide an upfront estimate.

Sewer line repair may not be the most glamorous topic, but it’s one every homeowner should understand. With modern technology and expert help, it’s possible to tackle sewer issues efficiently and with minimal disruption to your life. Staying informed and proactive can save you time, money, and a whole lot of stress.

How to Choose the Right Fixtures for Your Bathroom

Choosing the right fixtures for your bathroom is more than just a matter of taste—it’s a key decision that affects the room’s functionality, comfort, and long-term value. Whether you’re doing a full remodel or a simple refresh, your choices for faucets, showerheads, sinks, and lighting will impact everything from your morning routine to your home’s resale value. In this guide, we’ll walk you through the essentials of selecting bathroom fixtures that are both stylish and practical, while also touching on important considerations like compatibility with your plumbing system.

  1. Start With a Plan

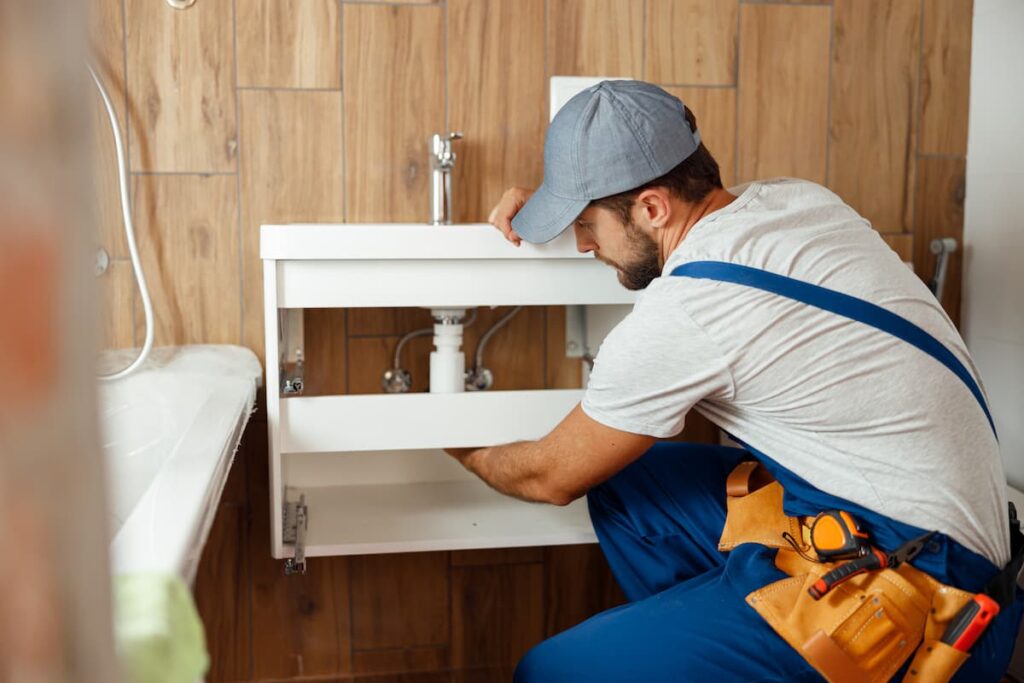
Before you browse catalogs or visit showrooms, evaluate your bathroom’s layout and your specific needs. Do you have a compact powder room or a spacious master bath? Will the space be used by kids, guests, or just you? Knowing how the bathroom will be used helps you prioritize features such as durability, ease of cleaning, and accessibility.

It’s also crucial to consider your existing plumbing layout. If you’re not doing a full remodel, your choices may be limited by where your pipes are located. Moving plumbing lines can increase your budget significantly, so make sure your new fixtures are compatible with what’s already in place.

  1. Choose a Cohesive Style

A visually unified bathroom feels more comfortable and inviting. When selecting fixtures, think about the overall design style you want to achieve—modern, traditional, industrial, farmhouse, or something else entirely. Your faucet finish, light fixtures, and even towel bars should all reflect this aesthetic.

Common fixture finishes include:

Chrome: Affordable and easy to clean, chrome works well in modern spaces.

Brushed nickel: A warmer tone than chrome, offering a softer, more muted look.

Matte black: Bold and contemporary, but requires careful coordination with other elements.

Brass and gold: Luxurious and vintage-inspired, these are making a comeback in upscale bathroom designs.

Stick with one or two finishes to avoid a cluttered appearance.

  1. Prioritize Quality and Functionality

Bathroom fixtures endure frequent use and exposure to moisture, so quality materials and construction are essential. Look for products made with solid brass, stainless steel, or other corrosion-resistant materials. Avoid plastic fixtures where possible, as they tend to wear out quickly.

Water efficiency is another factor to consider. Look for faucets, showerheads, and toilets with WaterSense certification, which indicates they meet EPA criteria for water savings without sacrificing performance. This not only helps the environment but can also lower your utility bills.

  1. Focus on the Sink and Faucet Combo

The sink and faucet are among the most-used items in any bathroom, so choose ones that complement each other both functionally and visually. Consider the following:

Sink style: Undermount, vessel, and pedestal sinks all have unique requirements. Make sure the faucet’s height and reach are appropriate for the sink design.

Faucet type: Single-handle faucets are space-saving and easy to use, while widespread faucets offer a more classic look with separate hot and cold handles.

Don’t forget to measure your vanity top and check spacing requirements. A fixture that looks beautiful online might be oversized or impractical for your setup.

  1. Select the Right Shower Fixtures

Today’s showers go far beyond a simple showerhead. You can choose from rain showers, handheld units, body jets, and even digital control systems. Decide what experience you want—invigorating, spa-like, or simple and efficient—and choose fixtures accordingly.

Make sure your plumbing supports your selections. Some luxury shower systems require higher water pressure or additional valve configurations. A licensed plumber can help assess your current setup and recommend compatible upgrades.

  1. Don’t Forget Lighting and Ventilation

While not always considered “fixtures” in the narrow sense, lighting and ventilation are essential parts of your bathroom’s functionality and comfort. Choose lighting that provides ample brightness for tasks like shaving or applying makeup, but also consider adding dimmable options for a relaxing bath environment.

As for ventilation, a high-quality exhaust fan prevents mold growth and protects your fixtures from premature wear due to humidity. Many modern fans come with integrated lighting or humidity sensors, making them both functional and discreet.

  1. Match Fixtures With Your Budget

Fixtures come in a wide range of price points. Set a realistic budget that prioritizes what matters most to you. You might choose to invest in a high-end shower system while opting for more affordable accessories like towel bars and robe hooks.

Remember, expensive doesn’t always mean better. Read reviews, check product warranties, and ask for recommendations from professionals. A moderately priced faucet with a solid brass core may outperform a more expensive one made of inferior materials.

  1. Hire Professionals When Needed

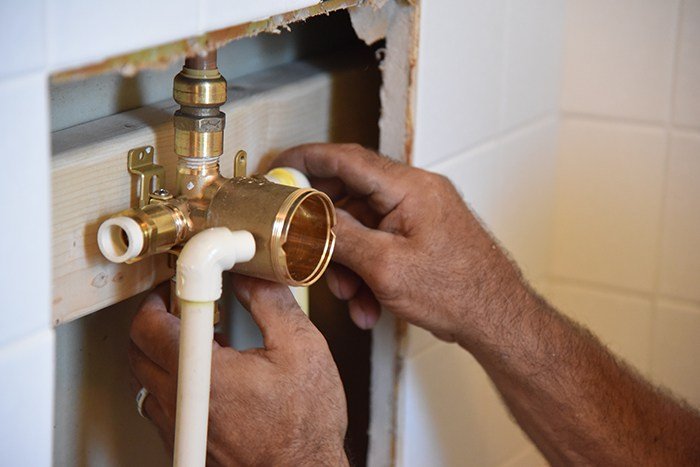
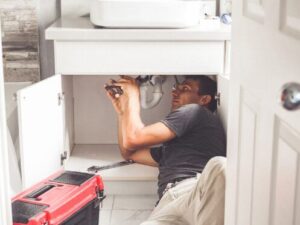
While many bathroom upgrades can be DIY-friendly, certain installations—especially those involving plumbing—should be left to the pros. Improper installation can lead to leaks, water damage, and even voided warranties. Hiring a qualified plumber ensures that your fixtures are installed correctly and safely.

It’s also a good idea to consult a designer or contractor if you’re tackling a major renovation. Their insights can help you avoid common mistakes and streamline your decision-making process.

Choosing the right bathroom fixtures is a balance of aesthetics, performance, and practicality. By considering your bathroom’s layout, existing plumbing, style preferences, and daily needs, you can create a space that not only looks great but also functions beautifully for years to come.

Common Kitchen Plumbing Issues and How to Fix Them

The kitchen is the heart of any home, and its plumbing plays a vital role in keeping everything running smoothly. From washing dishes to preparing meals, we rely heavily on our sinks, garbage disposals, and dishwashers. But when something goes wrong, it can throw off your entire routine. In this post, we’ll explore the most common kitchen plumbing issues and how to fix them, saving you time, money, and stress.

  1. Clogged Sink Drains

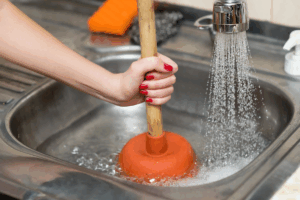
One of the most frequent problems homeowners face is a clogged kitchen sink. Food scraps, grease, soap residue, and even coffee grounds can accumulate over time, leading to a slow-draining or completely blocked sink.

How to Fix It:

Start by pouring boiling water down the drain. If that doesn’t clear the clog, try a mixture of baking soda and vinegar. Pour ½ cup of baking soda into the drain, followed by ½ cup of vinegar. Let it sit for 15–30 minutes before flushing with hot water.

For more stubborn clogs, a plunger can be useful. If the clog persists, you might need to use a drain snake or remove the trap under the sink to clear the blockage manually.

  1. Leaky Faucets

A dripping faucet isn’t just annoying—it can waste hundreds of gallons of water a year and increase your utility bill. This issue is typically due to worn-out washers or seals within the faucet.

How to Fix It:

First, turn off the water supply to the faucet. Then, disassemble the faucet and inspect the washers, O-rings, and cartridges. Replace any worn or damaged parts. Most home improvement stores carry repair kits for popular faucet brands, making this a relatively easy DIY plumbing repair.

  1. Low Water Pressure

If your kitchen faucet has a weak stream, it may be due to low water pressure. This can result from a clogged aerator, a partially closed shutoff valve, or mineral buildup in the pipes.

How to Fix It:

Unscrew the aerator at the tip of the faucet and clean it thoroughly. Soaking it in vinegar can help remove mineral deposits. If that doesn’t work, check the shutoff valves under the sink to ensure they are fully open. Persistent issues may indicate a more serious plumbing problem that requires professional help.

  1. Garbage Disposal Malfunctions

Garbage disposals are convenient but often mistreated. Common problems include jams, strange noises, or the unit not turning on at all.

How to Fix It:

If your disposal isn’t working, first check if it’s plugged in and if the reset button (usually located on the bottom) has tripped. If it’s jammed, turn off the power and use an Allen wrench to manually rotate the impeller from below. Avoid putting fibrous foods, grease, or hard items like bones in the disposal to prevent future problems.

  1. Dishwasher Drainage Problems

A dishwasher that doesn’t drain properly can leave dirty water sitting in the bottom of the unit. This issue is often linked to clogs in the drain hose or air gap.

How to Fix It:

Inspect the drain hose for blockages or kinks. You can also clean the air gap (the small cylindrical fixture next to your faucet) by removing the cap and clearing any debris. Running a cleaning cycle with vinegar can help remove buildup from inside the machine.

  1. Leaky Pipes Under the Sink

Leaks under the kitchen sink are usually due to loose connections, worn-out gaskets, or corrosion in the pipes. These leaks can damage cabinetry and flooring if left unchecked.

How to Fix It:

Identify the source of the leak. Tighten any loose slip nuts or connections, and replace washers or gaskets as needed. For cracked pipes or corroded sections, it may be necessary to replace part of the piping. Be sure to turn off the water before attempting any repairs.

  1. Smelly Drains

Foul odors coming from your kitchen sink can be caused by rotting food particles trapped in the drain or garbage disposal.

How to Fix It:

Flush the drain with baking soda and vinegar, then follow with hot water. For the garbage disposal, grind up citrus peels (like lemon or orange) and ice cubes to freshen the smell. You can also clean the rubber splash guard, which often harbors food residue.

When to Call a Professional

While many kitchen plumbing issues can be handled with basic tools and a little know-how, some problems require a professional plumber. If you experience persistent clogs, recurring leaks, or suspect a hidden water line issue, don’t hesitate to seek expert help. Attempting complex plumbing repairs without the proper experience can lead to further damage and costly repairs down the line.

Keeping your kitchen plumbing in good shape doesn’t have to be a daunting task. By staying attentive to common warning signs and performing regular maintenance, you can avoid many problems before they escalate. Whether it’s a leaky faucet or a clogged drain, having a basic understanding of how to tackle these issues empowers you to take control of your home’s plumbing.

Remember, your kitchen should be a place of comfort and convenience—not plumbing headaches. Stay proactive, and your pipes will thank you!

The Beginner’s Guide to Plumbing Tools

Whether you’re a first-time homeowner or a DIY enthusiast looking to tackle small repairs around the house, having the right plumbing tools is essential. Plumbing issues—from leaky faucets to clogged drains—are bound to happen, and being prepared can save time, money, and stress. This guide breaks down the basic tools you need to get started, what they do, and how to use them safely and effectively.

Why You Need Plumbing Tools

Plumbing is one of the most important systems in your home, responsible for delivering clean water and removing waste. When something goes wrong, quick action is often necessary to prevent further damage. While some jobs will require a licensed plumber, many small plumbing repairs can be handled by homeowners with the right tools and a bit of knowledge.

Essential Plumbing Tools for Beginners

Here are the must-have tools every beginner should consider adding to their toolbox:

  1. Pipe Wrench

The pipe wrench is the iconic plumbing tool. It’s used to grip and turn metal pipes and fittings. With serrated jaws and an adjustable head, it can clamp tightly onto round objects. You’ll often need two pipe wrenches—one to hold the pipe steady and another to turn.

Tip: Wrap a cloth around the pipe before using the wrench to prevent scratches or damage.

  1. Adjustable Wrench (Crescent Wrench)

This versatile tool is essential for tightening and loosening nuts and bolts, especially compression fittings and supply line connections. Make sure the wrench is properly adjusted before turning to avoid rounding off the corners of the fitting.

  1. Plunger

A classic plunger is a must-have in any household. It’s used to dislodge clogs in sinks, toilets, and tubs using suction and pressure. There are two common types: the cup plunger (for sinks and tubs) and the flange plunger (designed for toilets). Knowing the right plunger to use is key for effective clog removal.

  1. Plumber’s Tape (Teflon Tape)

Also known as thread seal tape, this thin white tape is wrapped around the threads of pipes to create a watertight seal and prevent leaks. It’s inexpensive and can be a lifesaver when assembling threaded pipe joints.

Tip: Wrap the tape in the direction of the thread—usually clockwise—so it doesn’t unravel as you tighten.

  1. Pipe Cutter

When working with copper or plastic pipes, a pipe cutter provides clean, straight cuts that are difficult to achieve with a hacksaw. These tools are easy to use and produce less mess, making them ideal for indoor plumbing projects.

  1. Basin Wrench

A basin wrench is designed to reach and turn fasteners in tight spaces, especially under sinks. Its long shaft and swiveling jaw make it perfect for dealing with the hard-to-reach nuts that secure faucets to sinks.

  1. Pliers (Tongue-and-Groove)

Also known as channel-lock pliers, these are useful for gripping, twisting, pulling, and holding just about anything. Their adjustable design makes them ideal for a wide variety of plumbing tasks.

  1. Drain Snake (Hand Auger)

When a plunger isn’t enough, a drain snake can tackle deeper clogs in sinks, tubs, or shower drains. This flexible, coiled wire is inserted into the drain and manually cranked to dislodge obstructions.

Pro Tip: Use caution when using a drain snake in older pipes to avoid damaging them.

  1. Bucket and Rags

While not technically tools, having a bucket and some old towels or rags nearby is a must for any plumbing job. Leaks and spills are common, and being prepared can help keep your workspace clean and dry.

Safety Tips for Plumbing Work

Before diving into any plumbing project, keep the following safety tips in mind:

Always turn off the water supply before starting a repair.

Know where your home’s main water shut-off valve is located.

Wear gloves and eye protection when working with chemicals or sharp tools.

Don’t force fittings or pipes—they can break or cause damage.

When in doubt, consult a professional plumber.

Building Your Confidence

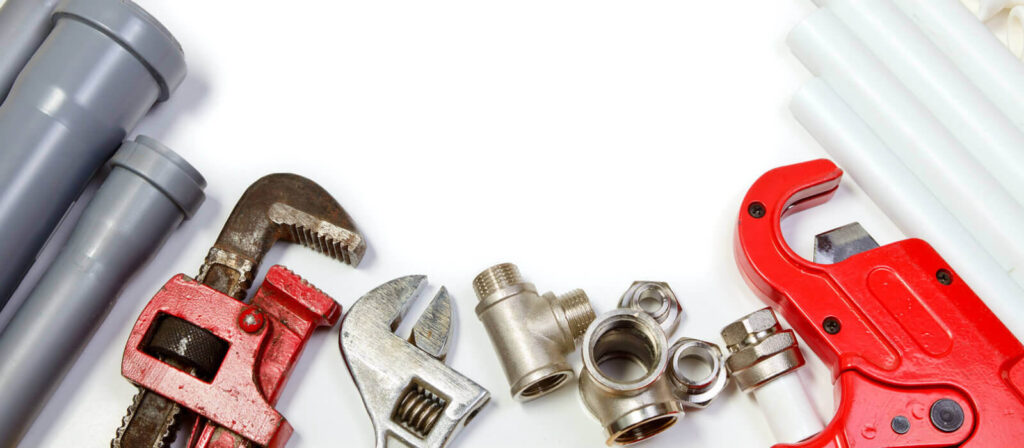
Starting with small repairs—like fixing a dripping faucet or unclogging a sink—can build your confidence and skills. As you become more comfortable using these basic plumbing tools, you’ll be better prepared to take on more complex tasks, saving money and potentially preventing costly damage.

Remember, plumbing doesn’t have to be intimidating. With a little patience, some practice, and the right tools, anyone can learn the basics of home plumbing maintenance.

Equipping yourself with essential plumbing tools is the first step toward becoming a more self-reliant homeowner. These basic items—many of which are affordable and easy to find at your local hardware store—can empower you to fix common issues on your own and understand your home’s systems better. Over time, your toolbox might grow, but these foundational tools will remain central to your plumbing adventures.

Plumbing Terminology Explained

Whether you’re tackling a home renovation, addressing a leaky pipe, or simply want to better communicate with a contractor, understanding basic plumbing terminology can be a game-changer. Plumbing is an essential system in any building, and knowing the language used by professionals can save you time, money, and stress. In this guide, we’ll break down key terms every homeowner should know.

Why Plumbing Terminology Matters

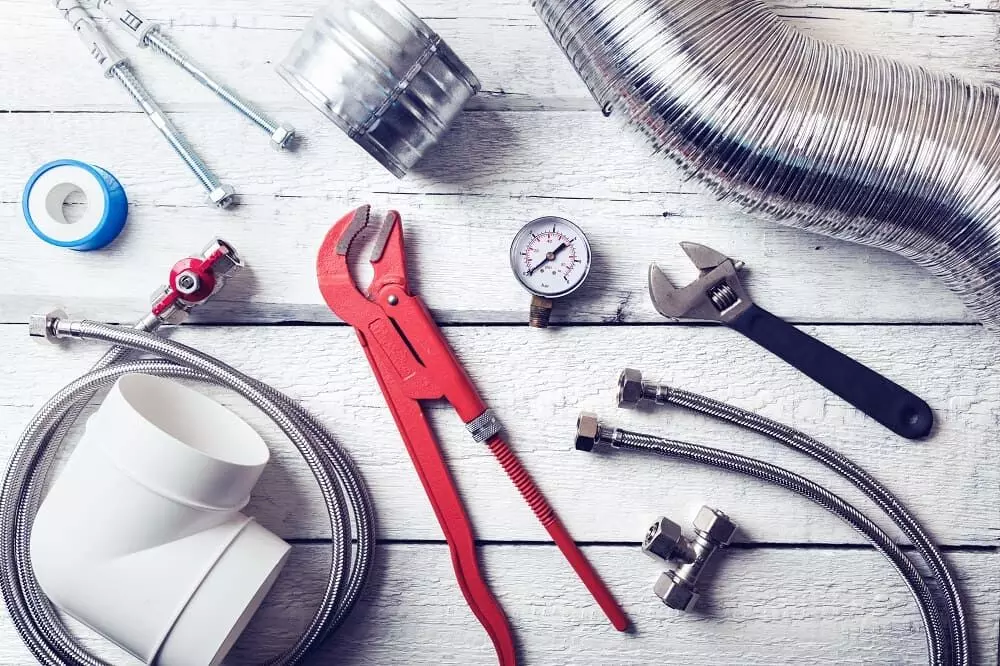
The field of plumbing may seem like a world of its own, filled with jargon that can sound overwhelming to the uninitiated. However, when you understand the terminology, you’re better equipped to describe issues accurately, comprehend invoices, and even tackle minor DIY repairs. From fixtures to fittings, plumbing language is a valuable tool in homeownership.

Common Plumbing Terms and What They Mean

Here are some of the most commonly used plumbing terms explained in plain English:

  1. Fixture

A plumbing fixture refers to any device that interacts with water in your home. Common fixtures include sinks, toilets, bathtubs, and showers. These are the end points of the plumbing system, where water is delivered and waste is drained.

  1. Trap

A trap is the curved section of pipe found under most sinks and drains. This important component holds a small amount of water at all times, creating a seal that prevents sewer gases from entering your home. One of the most recognizable types is the P-trap, named for its shape.

  1. Valve

Valves control the flow of water within your plumbing system. There are many types, such as shut-off valves (used to stop the flow of water to a particular fixture), check valves (which allow flow in only one direction), and pressure-reducing valves (which regulate water pressure). Knowing where these are in your home is critical in case of a leak or repair.

  1. Vent

A plumbing vent is a pipe that allows air to enter your drainage system. This helps wastewater flow smoothly and prevents suction from slowing or stopping the drainage. Vents typically exit through the roof, though they can sometimes be located elsewhere.

  1. Main Line

The main line is the primary pipeline that brings fresh water into your home from the municipal supply or a well. Conversely, the main sewer line carries waste away from your home to the public sewer system or septic tank. If either of these lines become clogged or damaged, it’s a major issue.

  1. Supply Line

Supply lines are the smaller pipes that deliver water from the main line to your fixtures. These lines are typically made of copper, PEX (cross-linked polyethylene), or CPVC (chlorinated polyvinyl chloride). Leaks in these pipes can lead to significant water damage if not addressed quickly.

  1. Shut-off Valve

Every plumbing fixture in your home should have its own shut-off valve. These allow you to turn off the water supply to a specific area without shutting off water to the entire house. This is useful during repairs or emergencies like a burst pipe.

  1. Flapper

Found inside your toilet tank, the flapper is a rubber valve that lifts to allow water to flow from the tank into the bowl during a flush, and then seals the tank afterward. If your toilet runs continuously, a faulty flapper may be to blame.

  1. Water Hammer

A water hammer is a loud banging noise that occurs when water flow is suddenly stopped, usually by a quick-closing valve. This causes a shockwave in the pipes. Not only is it noisy, but it can also damage your plumbing over time. Installing a water hammer arrestor can help reduce this problem.

  1. Auger

An auger, also known as a plumber’s snake, is a tool used to remove clogs from pipes. It works by extending a long, flexible cable into the pipe to dislodge or retrieve the obstruction. It’s a step up from a plunger and a favorite in any plumber’s toolkit.

Material Matters: Pipe Types and Their Uses

Understanding pipe materials is also a big part of plumbing terminology. Different materials are used for different applications:

Copper: Durable and widely used for water supply lines.

PVC (Polyvinyl Chloride): Common in drainage and vent systems due to its resistance to corrosion.

PEX: Flexible, easy to install, and resistant to scale and chlorine.

Galvanized Steel: Once common, now rarely used due to corrosion issues over time.

Each of these materials has its own benefits and limitations, and knowing which one runs through your home can be vital when planning maintenance or upgrades.

Learning the language of plumbing may not turn you into a licensed plumber overnight, but it can make you a more informed homeowner. It empowers you to have more effective conversations with professionals, spot issues early, and even tackle small repairs with confidence.

Next time you hear terms like “trap,” “supply line,” or “flapper,” you won’t be left scratching your head. Instead, you’ll know that you’ve taken a major step toward mastering one of the most important systems in your home.

Whether you’re embarking on a remodeling project or just want to be prepared for the next time something goes wrong under the sink, having a solid grasp of plumbing terminology is invaluable. After all, knowledge is the first step toward prevention—and better plumbing.

How Plumbing Can Help Conserve Water

Water is one of our planet’s most precious resources, yet it’s often taken for granted. As populations grow and climate change strains water supplies, conservation becomes not just important—it becomes essential. One powerful but often overlooked tool in water conservation is plumbing. Thoughtful plumbing design, regular maintenance, and modern technologies can significantly reduce water waste in both homes and businesses.

Plumbing: The Frontline of Water Efficiency

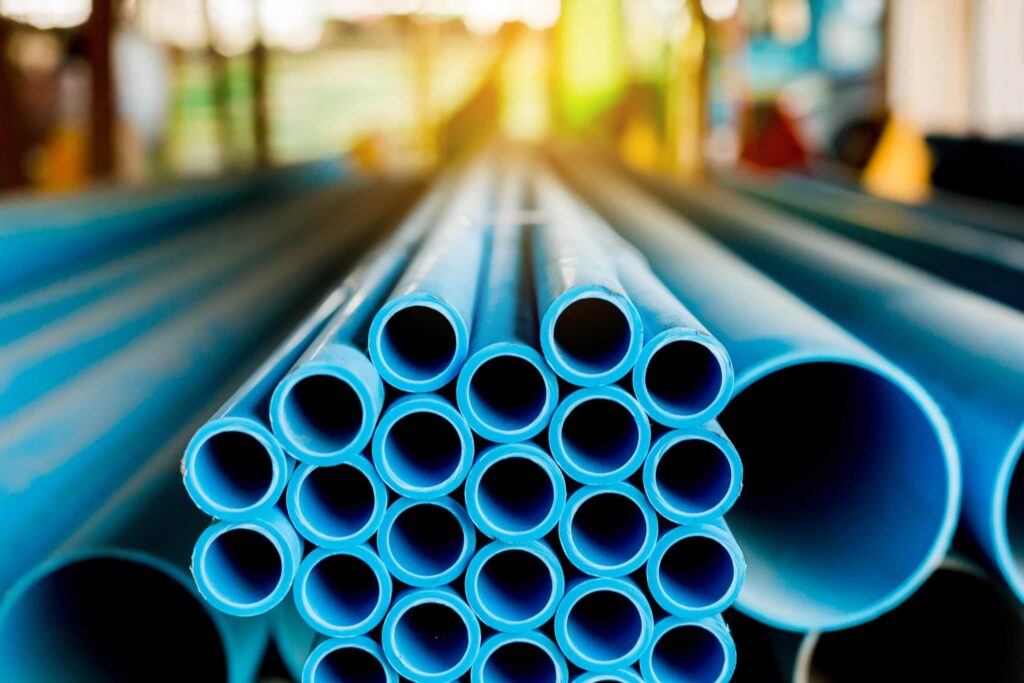
Plumbing systems serve as the backbone of water distribution and drainage in any building. A well-maintained plumbing system not only delivers clean water efficiently but also prevents leaks, overuse, and contamination. This makes plumbing a vital part of any water conservation strategy.

Leaky faucets, outdated fixtures, and old pipes can waste thousands of gallons of water annually. According to the U.S. Environmental Protection Agency (EPA), household leaks waste nearly one trillion gallons of water each year nationwide. Proper plumbing repairs can cut this number dramatically.

How Plumbing Helps Conserve Water

Leak Detection and Repair

One of the simplest ways plumbing contributes to conservation is through timely leak detection and repair. A dripping faucet can waste over 3,000 gallons of water per year, while a leaking toilet can waste even more. Skilled plumbers can use acoustic devices, infrared technology, or pressure sensors to detect leaks hidden within walls or underground. Prompt repairs not only conserve water but also prevent costly structural damage.

Installation of Low-Flow Fixtures

Modern plumbing systems often include low-flow toilets, showerheads, and faucets. These fixtures are designed to use less water without compromising performance. For instance, a standard toilet uses around 3.5 to 7 gallons per flush, while a low-flow model uses only 1.28 gallons. Over time, these savings add up—especially in homes with multiple residents or in commercial buildings.

Efficient Water Heaters and Pipe Insulation

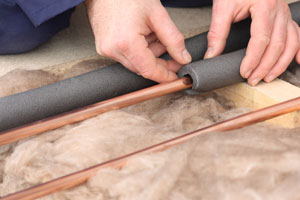
Plumbing plays a crucial role in how hot water is delivered. Traditional water heaters waste energy by keeping water hot even when it’s not needed. Tankless water heaters, installed by plumbing professionals, heat water on demand and use significantly less energy and water. Additionally, insulating pipes ensures that hot water arrives faster at faucets and showers, reducing the time water runs while waiting for it to heat up.

Greywater Recycling Systems

Innovative plumbing systems now support greywater recycling, where water from sinks, showers, and washing machines is filtered and reused for irrigation or toilet flushing. This reduces the demand for fresh water. Installing a greywater system involves specialized plumbing work but can halve a household’s water usage.

Smart Plumbing Technology

Smart plumbing is a new frontier in water conservation. Digital leak detectors, smart irrigation controllers, and app-connected water meters allow homeowners and businesses to monitor water usage in real-time. These systems alert users to unusual patterns, enabling quick responses to leaks or excessive use.

Rainwater Harvesting Integration

Advanced plumbing solutions can incorporate rainwater harvesting systems, channeling rain from roofs into storage tanks for landscape irrigation or even for non-potable indoor use. This setup requires careful plumbing to ensure the stored water is safe and that it doesn’t backflow into the municipal supply.

The Role of Professional Plumbers

While DIY maintenance can help with small tasks like replacing washers or sealing joints, complex plumbing upgrades should be left to licensed professionals. Plumbers understand local codes, efficiency standards, and installation techniques to ensure optimal performance and safety. More importantly, they can recommend eco-friendly solutions tailored to a building’s specific water use patterns.

Furthermore, during renovations or new construction, consulting a plumber early in the design phase can make a significant impact. Strategic pipe placement, correct sizing, and modern fixture selection can prevent water loss and reduce utility bills from the start.

Community and Environmental Impact

Beyond individual homes, plumbing plays a key role in large-scale conservation efforts. In cities, plumbing infrastructure determines how efficiently water moves from treatment facilities to homes and back again. Poorly maintained municipal plumbing can result in significant leakage—sometimes accounting for up to 30% of a city’s water loss.

Investing in better plumbing at the municipal level—such as replacing old mains or installing smart meters—can improve water delivery and reduce strain on local reservoirs and aquifers. Communities that prioritize water-efficient plumbing also build greater resilience against droughts and shortages.

Water conservation begins at the tap, and that’s where plumbing truly shines. Whether it’s through fixing leaks, installing low-flow fixtures, or integrating smart technology, plumbing provides the tools and techniques needed to use water wisely. In an era where every drop counts, thoughtful plumbing isn’t just a convenience—it’s a necessity.

By recognizing the role plumbing plays in conserving water, homeowners, businesses, and municipalities can make informed decisions that benefit not only their wallets but also the planet. It’s time we appreciate the pipes behind our walls—not just for delivering water, but for helping us preserve it.

How to Reduce Your Water Bill with Smart Plumbing

Water is one of the most essential resources in our lives, and with the increasing costs of utilities, it’s important to find ways to reduce consumption without sacrificing comfort. One of the most effective ways to achieve this is by utilizing smart plumbing solutions. Plumbing has evolved beyond the basic pipes and faucets we often think of when we consider water use. Today, there are a variety of modern systems and gadgets designed to help you save water and reduce your water bill. In this blog post, we will explore some of the most effective ways you can use smart plumbing technologies to cut your water usage and lower your utility bills.

  1. Install Low-Flow Fixtures

One of the simplest ways to reduce water usage is by installing low-flow fixtures. These include low-flow toilets, showerheads, and faucets. Low-flow toilets use significantly less water per flush compared to traditional models, and they have become a standard in many new homes. Low-flow showerheads and faucets use less water without compromising water pressure, so you can still enjoy a satisfying shower or wash your hands without wasting gallons of water.

When upgrading your plumbing fixtures, be sure to look for products with the WaterSense label. WaterSense-certified products are proven to meet strict water-efficiency guidelines set by the Environmental Protection Agency (EPA), ensuring that your new fixtures help you conserve water effectively.

  1. Invest in a Smart Irrigation System

If you have a garden or lawn, you likely use irrigation to keep your plants healthy. Traditional irrigation systems are often inefficient and can waste a lot of water. Smart irrigation systems, on the other hand, use sensors and weather data to adjust watering schedules based on factors such as soil moisture, temperature, and rainfall. This helps ensure that your plants are getting the right amount of water without overwatering them.

Smart irrigation systems can be controlled remotely through a smartphone app, allowing you to adjust settings based on your needs. Some systems even allow for automatic adjustments, so you don’t have to worry about forgetting to turn off the sprinklers on a rainy day. By reducing the amount of water you use for irrigation, you can significantly cut your water bill.

  1. Monitor Water Usage with Smart Meters

A smart water meter is a high-tech device that tracks your water usage in real-time. These meters send data to a central system, allowing you to monitor your consumption and detect any anomalies. For example, if your meter detects unusually high water usage, it can alert you to potential leaks or inefficiencies in your plumbing system.

With smart meters, you can easily identify patterns in your water usage and make adjustments as needed. Many smart water meters come with mobile apps that allow you to set alerts for when your water usage exceeds a certain threshold. By staying on top of your water consumption, you can make informed decisions to reduce your water usage and avoid unnecessary expenses.

  1. Detect Leaks Early

Water leaks are one of the most common causes of high water bills. A small, undetected leak can waste hundreds of gallons of water without you even realizing it. Fortunately, there are now smart leak detection systems that can help you catch leaks early, before they turn into costly problems.

Smart leak detectors are installed at various points in your plumbing system, such as under sinks, behind toilets, or near water heaters. These devices use sensors to detect any changes in moisture or flow, and they can send alerts to your smartphone if a leak is detected. By fixing leaks as soon as they are identified, you can prevent water waste and avoid expensive repairs down the line.

  1. Upgrade Your Water Heater with a Smart System

Your water heater is another major contributor to your water bill. Traditional water heaters constantly heat and store water, even when it’s not being used, which can lead to energy waste. Smart water heaters, on the other hand, are designed to be more efficient. These systems allow you to set schedules for when hot water is needed, ensuring that the heater only operates when it’s required.

Some smart water heaters also come with built-in sensors that monitor water usage and adjust heating patterns accordingly. For example, if you typically use hot water at a specific time of day, the smart water heater will heat the water in advance so that it’s ready when you need it. This reduces the amount of energy and water wasted by constantly reheating water.

  1. Use a Greywater Recycling System

Another innovative smart plumbing solution to reduce your water bill is a greywater recycling system. Greywater is the relatively clean wastewater generated from activities like washing dishes, showering, and doing laundry. Rather than sending this water directly to the drain, a greywater recycling system collects it and filters it for reuse in non-potable applications, such as flushing toilets or watering the garden.

Installing a greywater recycling system can drastically reduce the amount of freshwater you need to use, cutting down on both your water and sewage bills. These systems are particularly useful in areas where water is scarce or expensive.

  1. Schedule Regular Plumbing Inspections

While smart plumbing solutions can certainly help reduce water consumption, regular plumbing inspections are still essential. Over time, your plumbing system can develop issues like clogged pipes, worn-out seals, or corroded fixtures, which can lead to water waste. By scheduling regular inspections with a professional plumber, you can catch any problems before they become costly and ensure that your plumbing is operating efficiently.

Smart plumbing technologies offer a wide range of benefits, from reducing water consumption to lowering your water bill. By upgrading to low-flow fixtures, investing in smart irrigation systems, installing smart water meters, detecting leaks early, and using energy-efficient water heaters, you can significantly reduce your water usage and enjoy lower utility bills. Additionally, integrating a greywater recycling system into your home can further minimize your reliance on freshwater, making your home more sustainable. With these smart plumbing solutions, you’ll not only save money but also contribute to a more sustainable future.

Water-Saving Plumbing Fixtures for Your Home


Water conservation is more important than ever, not only to help protect the environment but also to reduce utility bills. With increasing awareness of the need to conserve water, many homeowners are looking to make changes that reduce water usage. One of the most effective ways to achieve this is by upgrading plumbing fixtures. These fixtures play a crucial role in controlling water consumption throughout your home. In this article, we will explore some of the best water-saving plumbing fixtures available, how they work, and how they can benefit both your wallet and the planet.

Why Water-Saving Plumbing Fixtures Matter

Water-saving plumbing fixtures are designed to use less water than traditional fixtures without sacrificing performance. The key to their effectiveness lies in the innovative technologies used in their design, such as low-flow mechanisms, pressure regulation, and smart sensors. By reducing water waste, these fixtures can significantly lower your water usage, leading to both lower water bills and less strain on local water supplies.

Water-saving plumbing fixtures are not only environmentally friendly, but they also help reduce energy usage. Heating water accounts for a significant portion of energy consumption in a home, so using less water means less energy required to heat it. Whether you’re replacing faucets, showerheads, toilets, or other plumbing fixtures, you’ll be making a positive impact on both your finances and the environment.

Water-Saving Plumbing Fixtures to Consider

Low-Flow Faucets

Standard faucets can use up to 2.2 gallons of water per minute (gpm), but low-flow faucets use only 1.5 gpm or less. These faucets use aerators that mix air with the water stream, maintaining the sensation of a full flow while actually using less water. This simple yet effective adjustment can significantly reduce water waste in kitchens and bathrooms. Whether you’re washing your hands or cleaning dishes, switching to low-flow faucets can add up to considerable water savings over time.

Water-Efficient Showerheads

Showerheads are another area where water-saving plumbing fixtures can make a noticeable difference. Traditional showerheads can use between 4 and 5 gallons of water per minute, but water-efficient showerheads can reduce this to 2.5 gpm or even less. These showerheads are designed to optimize water pressure while reducing the volume of water being used. Many models also feature adjustable settings that allow you to customize the spray to your liking, so you don’t have to sacrifice comfort for conservation.

Dual-Flush Toilets

Toilets are one of the largest water consumers in the average home, with older models using as much as 3.5 to 7 gallons per flush. Dual-flush toilets are designed to provide two flushing options: one for liquid waste (using about 1.1 gallons) and another for solid waste (using 1.6 gallons). This allows homeowners to conserve water by choosing the appropriate flush for the situation. By upgrading to a dual-flush toilet, you can cut down on water usage without compromising on performance.

Low-Flow Bidets

Bidets have gained popularity in recent years as an alternative to traditional toilet paper. While they are often used for personal hygiene, bidets also contribute to water conservation. Traditional bidets use more water than necessary, but modern low-flow bidets have been designed to use minimal water. These water-saving plumbing fixtures offer a hygienic, environmentally friendly alternative to toilet paper while reducing water consumption.

Automatic Faucet and Toilet Sensors

For added water efficiency, consider installing automatic faucets and toilets with sensors. These smart fixtures detect motion, allowing them to turn on and off automatically, so you don’t waste water by leaving the tap running. These sensors also help to prevent overflows, which is an especially important feature in toilets. When you combine automation with other water-saving features, you’re guaranteed to make a noticeable difference in your overall water consumption.

Water-Saving Appliances

While not strictly plumbing fixtures, water-saving appliances such as dishwashers and washing machines play a major role in water conservation. Modern dishwashers and washing machines are designed to use less water per load while still delivering excellent cleaning performance. Choosing an energy-efficient, water-saving appliance can have a significant impact on your home’s overall water usage.

Tankless Water Heaters

Tankless water heaters, also known as on-demand water heaters, are a great option for homeowners looking to reduce water and energy waste. Unlike traditional water heaters that store and continuously heat a large tank of water, tankless water heaters heat water only when you need it. This means no water is wasted waiting for a tank to heat up, and you can enjoy a continuous supply of hot water on demand. The reduced standby energy loss also makes tankless water heaters an energy-efficient choice.

Additional Tips for Saving Water in Your Home

In addition to upgrading your plumbing fixtures, there are several other simple steps you can take to reduce water consumption in your home:

Fix Leaks Promptly: Even a small leak can waste a significant amount of water over time. Be sure to fix any leaks in faucets, pipes, or toilets as soon as you notice them.

Install a Water Meter: Monitoring your water usage can help you identify areas where you can make improvements. A water meter will give you real-time data about how much water you’re using.

Use a Watering Timer: If you have an irrigation system, using a watering timer can help ensure that you’re not over-watering your lawn or garden.

Shorten Showers: Try to limit shower time to 5 minutes or less. You can also turn off the water while you lather or shampoo to reduce water usage.

Upgrading to water-saving plumbing fixtures is a smart and eco-friendly decision for any homeowner. From low-flow faucets to dual-flush toilets and water-efficient showerheads, there are many options available to help you conserve water. Not only will you reduce your environmental impact, but you’ll also save money on your water bill. So, take a closer look at your current plumbing system and start making changes today for a more sustainable home.

What Does a Plumber Do?

Plumbing is a vital service that is often taken for granted until something goes wrong. From a leaky faucet to a blocked toilet or a broken water heater, plumbing problems can quickly disrupt your daily routine. But have you ever wondered exactly what plumbers do on the job? In this blog post, we’ll explore the role of a plumber, what their job entails, and why plumbing is such an essential part of maintaining a functional home or business.

What is Plumbing?

Plumbing refers to the system of pipes, fixtures, and other apparatus required for the water supply and drainage in buildings. It involves both water systems and sewage systems that are essential for providing clean water, draining waste, and ensuring the overall comfort and health of a household or commercial building. While most people think of plumbing as merely fixing leaks or clogged drains, there’s much more to the job than that.

The Role of a Plumber

A plumber is a trained professional who specializes in installing and repairing the systems that allow water and waste to flow throughout a building. Their work is essential to creating a safe and comfortable living or working environment. Let’s take a closer look at what plumbers actually do on a day-to-day basis.

Installing Plumbing Systems

One of the primary tasks of a plumber is installing new plumbing systems. This includes setting up water supply lines, drainage systems, and gas lines. Whether it’s a new home or a commercial building, plumbers ensure that the plumbing is correctly set up to meet the needs of the space. They work closely with architects, builders, and other contractors to ensure that the plumbing systems are integrated seamlessly into the structure.

Repairing Leaks and Pipe Damage

Plumbers are also known for their expertise in identifying and repairing leaks. Over time, pipes can develop leaks due to wear and tear, temperature changes, or external pressure. A skilled plumber will use various tools and techniques to locate the source of the leak, which may not always be visible to the naked eye. Once identified, the plumber will either patch the leak or replace the affected pipe altogether. Repairing leaks promptly is crucial to prevent water damage, mold growth, and higher utility bills.

Unclogging Drains and Toilets

Clogged drains and toilets are among the most common plumbing problems people face. While some clogs can be handled with a plunger, others may require professional help. Plumbers use specialized tools such as drain snakes, hydro-jetting machines, and video inspection devices to locate and clear blockages in the plumbing system. These tools allow plumbers to safely remove debris, grease, and other materials causing the blockage, ensuring that water can flow freely through the pipes once again.

Maintaining and Repairing Water Heaters

Water heaters are essential for providing hot water to a building, but they require regular maintenance to keep them functioning properly. Plumbers are trained to inspect and repair water heaters. This includes flushing out sediment buildup, checking the thermostat, replacing heating elements, and ensuring that the unit is operating efficiently. Proper maintenance can extend the life of a water heater and prevent costly breakdowns.

Gas Line Installation and Repair

Plumbers also work with gas lines, which are used to deliver natural gas for heating, cooking, and other purposes. Installing or repairing gas lines is a highly specialized and dangerous job that requires a great deal of expertise. Plumbers must ensure that gas lines are installed properly to avoid leaks that could pose serious safety hazards. Regular inspections of gas lines are also essential to prevent potential accidents.

Bathroom and Kitchen Remodels

Many homeowners and business owners hire plumbers when renovating their kitchens or bathrooms. Plumbers play a key role in ensuring that new sinks, bathtubs, showers, toilets, and dishwashers are correctly installed and connected to the existing plumbing system. They may also be required to reroute pipes to accommodate new fixtures or layouts. Plumbing for remodels can be a complex task, as it often involves working within tight spaces and coordinating with other contractors.

Plumbing Inspections and Maintenance

Plumbers perform regular inspections of plumbing systems to identify potential problems before they become major issues. During a plumbing inspection, they will examine pipes, water pressure, drains, and other components of the system. By identifying small problems early, plumbers can help prevent costly repairs down the line. Routine maintenance, such as cleaning drains, checking for leaks, and inspecting water heaters, can also improve the efficiency and lifespan of a plumbing system.

Why Plumbing is Important

Without plumbing, we would face major challenges in daily life. Access to clean water for drinking, cooking, bathing, and sanitation is essential for health and well-being. Plumbing systems also help in managing waste, ensuring that wastewater is safely disposed of without contaminating living environments. The work that plumbers do, often behind the scenes, is crucial to maintaining the safety, comfort, and functionality of homes and businesses.

Additionally, plumbing helps in conserving water and energy. A well-maintained plumbing system can reduce water wastage, lower energy bills, and ensure that water is used efficiently. By properly insulating pipes, fixing leaks, and upgrading outdated fixtures, plumbers can help homeowners save money and contribute to sustainability efforts.

Plumbing is an essential part of modern life, and the role of a plumber is far more intricate than simply fixing a leaky faucet. From installing new plumbing systems to repairing water heaters and ensuring that waste is properly managed, plumbers are responsible for maintaining the systems that keep our homes and businesses functioning smoothly. If you ever encounter a plumbing issue, don’t hesitate to call a professional plumber—they have the expertise to solve the problem efficiently and effectively, ensuring that your plumbing system operates as it should for years to come.

Update cookies preferences